In this guide, we will be showing you how to reset MSI Afterburner to default settings. If you have installed MSI Afterburner to overclock your graphics card but would like to revert the settings back to default, then there are two ways of doing this which we have listed in this guide.
MSI Afterburner is an easy way to overclock your graphics card and make changes, and that’s why this program is used by many PC gamers. We also have made changes to make our graphics cards run better!
But as MSI Afterburner has so many different options you can lose track of what settings you might have changed. Luckily there are two easy ways of resetting them back, so below we have listed the two different methods for you.
Table Of Contents
Why reset settings in MSI Afterburner?
There are many reasons why someone might want to reset the settings within MSI Afterburner. It could be you have made some changes that you are unsure about and want to restore the defaults such as:
- You have fitted a new graphics card into your system so you will need to change your overclock settings
- You have messed up Voltage curve, Clock, or fan settings and want to reset these
How to reset MSI Afterburner settings
Below we have listed the steps to reset the voltage & voltage curve, clock and fan settings you have made within MSI Afterburner on your Windows PC or laptop.
1. First, you need to launch MSI Afterburner
2. Once open you will see either a button that says Reset or a Curved Arrow (this will depend on the skin you are using as you can change the MSI Afterburner skin)
3. Click the Reset button and this will reset the overclock settings you have changed back to default

How to reset MSI Afterburner back to default
Below we have listed the steps to reset everything in MSI Afterburner. This will also remove all profiles that you have made.
1. First close MSI Afterburner
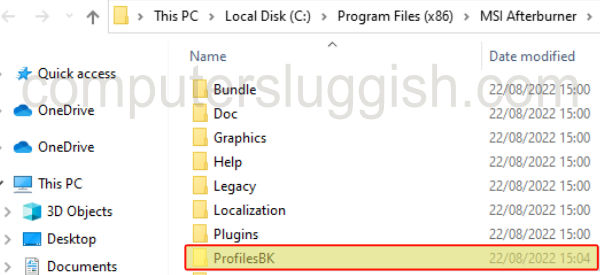
2. Go to the location where you installed MSI Afterburner
3. Once in the directory find the Profiles folder
4. Right-click the folder and click Rename
5. Now rename the folder to ProfilesBK
6. Once finished open MSI Afterburner and everything will be reset to default settings
We hope the above guide helped you reset MSI Afterburner on your Windows computer and you can now proceed in making more changes within the program from scratch.
If you enjoyed this guide then we are sure you would like our other Windows guides.
Check out our YouTube video here on “MSI Afterburner reset to default settings” if you are getting stuck.