

Changing Windows 10 Visual Effects & Make It Look Better
In this Windows 10 post, we will be taking a look at how you can make Windows 10 look its best by changing a setting that will make Windows 10 look better.
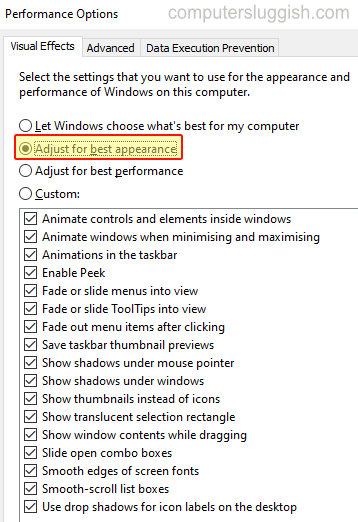
Some of the appearance settings include; Animated controls, windows, fading of menus, shadows under windows, smoother fonts, etc.
However, if you find your computer does struggle at times to run Windows 10 you might be better off turning some of these visual effects off to help make Windows 10 run smoother. Below we have written the steps to make Windows 10 have its best appearance.
Adjusting Windows 10 for Best Appearance:
1. Open the start menu and search “Adjust the appearance and performance of Windows” then open it
2. Now click the “Visual Effects” tab
3. Now select “Adjust for best appearance” then click Apply and “OK” button
There you have it that is how you can adjust windows 10 to have its best appearance.
Like we said above if you don’t like some of the visual effects that it’s added then you can untick the visual effect that you would like to remove from Windows 10.
Check out more of our windows 10 posts here.