

Windows 10 How To Change Your Default Photo Viewer
By default Windows 10 uses Photos as the default app to open all of your photos and images on your PC or laptop.
But if you have a different photo viewer that you prefer then you can set that as your default instead.
In this post, we will be showing you how you can change the default photo viewer that Windows 10 uses, see the steps below.
Steps For Changing Your Default Photo Viewer:
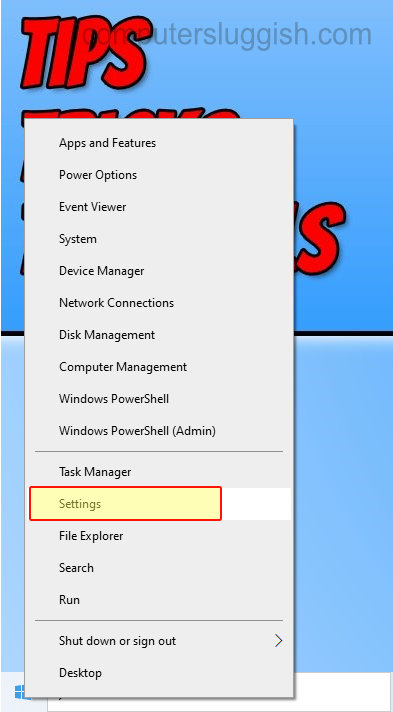
1. Right-click start menu > Settings
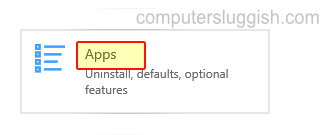
2. Click “Apps“
3. Click “Default apps” from the left menu
4. Now under “Photo Viewer” click the button and change it to the Photo Viewer that you would like as your default

There you have it you have now changed the default photo viewer that Windows 10 uses and all of your photos will now open with it. If you liked this post then check out more Windows posts here.