In this guide we will be taking a look at how you can move the location of the documents folder in Windows, changing the directory of your documents folder can be very handy when it comes to saving disk space on your local Windows Drive, which is known as your C: Drive.
The documents folder can accrue an extreme amount of data which is why it’s a good idea to change the directory to a bigger disk drive, especially if you are using a small SSD for Windows 10/11. Also another benefit is if your Windows operating system becomes corrupt you won’t lose any of your data, as it will all be stored on a different hard drive if you choose to move your documents to a different drive.
If you have another computer connected to the network you could even store the folder on that computer, but just remember you will not be able to access your files and folders if that computer is not turned on or you are not connected to the network, which could cause problems so this is not recommended.
Keep your personal files safe from Windows corruption by choosing a different hard drive that Windows 10/11 is not installed on.
Move documents folder Windows
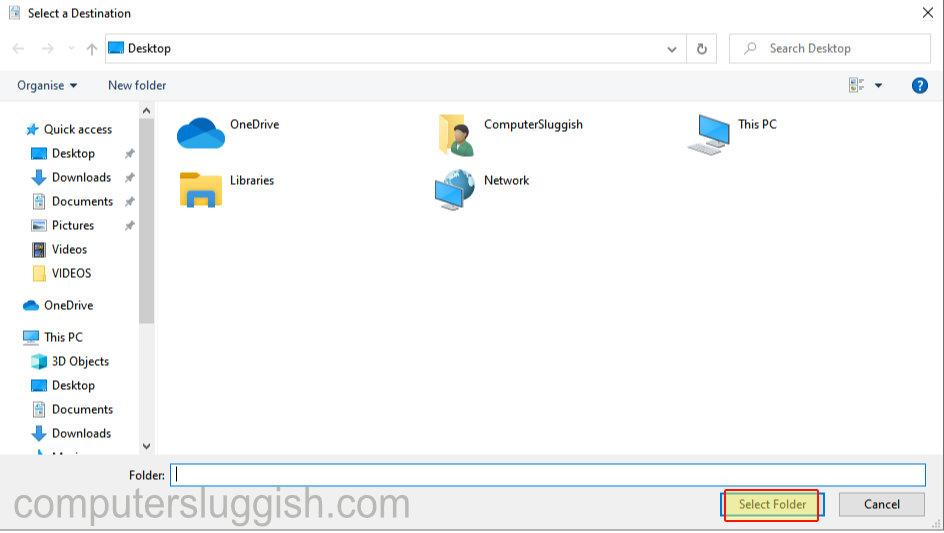
Below are the steps to change your documents folder location in Windows 10.
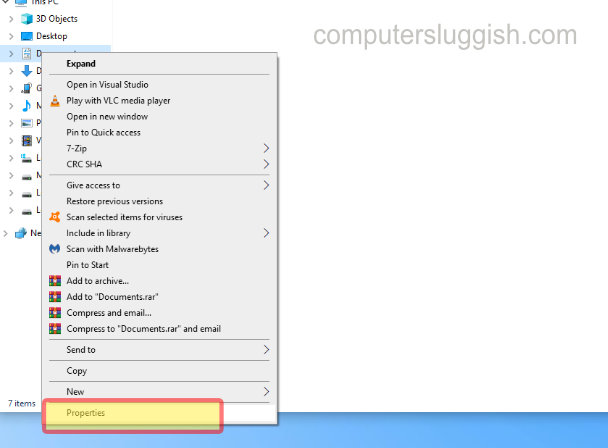
1. Open File Explorer
2. Right Click Documents > Properties
3. Select Location tab > Click on “Move”

4. Click on your chosen new location and click on ‘select folder’ > Press Apply > Press OK