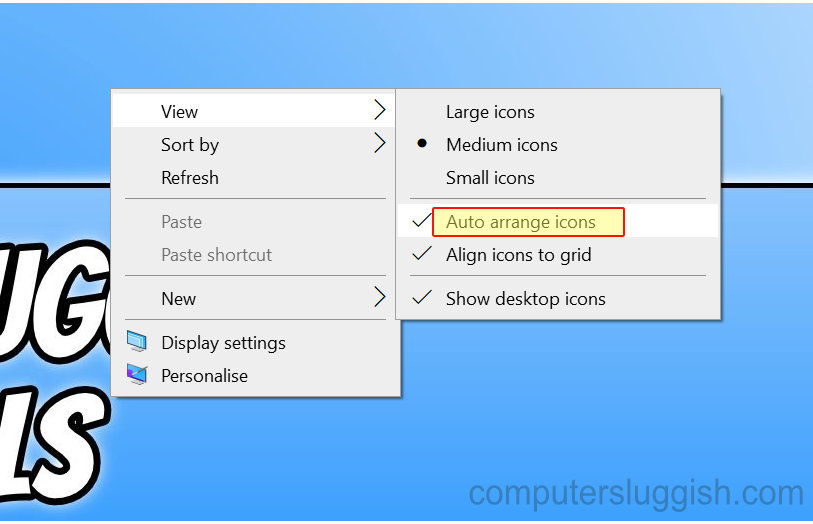
Arrange Multiple Desktop Icons Quickly!
This Windows 10 tutorial will show you how to enable or disable auto arrange of your desktop icons on your PC or laptop.
If you don’t have the time or just simply don’t want to constantly keep rearranging the icons on your desktop (especially if you have a lot of them), then you can let Windows 10 do this for you.
This can be very handy as it will auto arrange your icons and shortcuts into columns in name order. This will save you a lot of time and effort.
To turn on auto-arrange Icons:
1. Right-click on an empty area on your desktop > Hover over ‘view’ > Click onto “Auto arrange icons” so that it has a tick next to it (You will now notice Windows 10 has moved your icons into an organized order and position)
To turn auto arrange icons off:
1. Right-click on an empty area on your desktop > Hover over ‘view’ > Click onto “Auto arrange icons” so that the tick is removed

****Top Tip****
If you turn on auto-arrange you will not be able to move any of the icons into a position of your own choice until you have disabled the option

