This Windows 10 guide will show you how to turn off the automatic setup of network connected devices on your computer. Windows 10 has a ‘Network Discovery’ setting which allows your PC to see other network computers and devices and also makes your PC visible to other network computers.
If you don’t want any network devices to automatically connect to your PC, for example wireless printers that will install onto your PC or laptop every time you connect to the network, then follow the steps in this tutorial and you should be able to stop this very frustrating issue.
Stop devices connecting to Windows 10
Below are the steps to stop other devices on your network from automatically connecting and being added to your computer.
1. Type in Control Panel in Windows search bar (bottom left-hand corner)
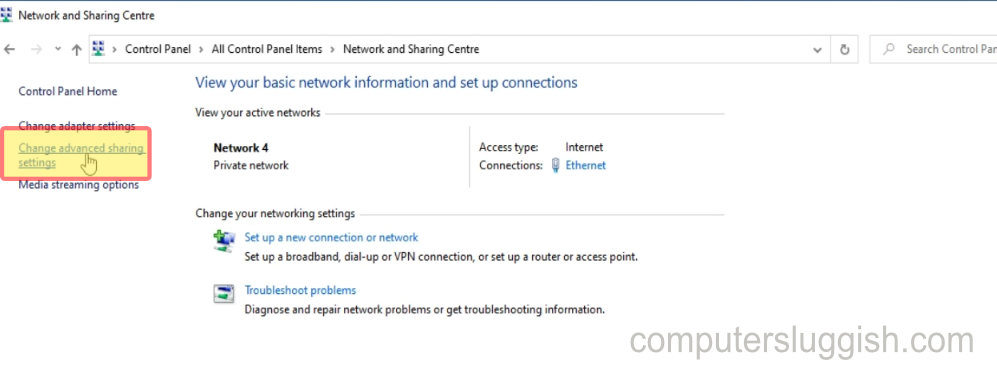
2. Open Control Panel > Network and Sharing Center > Change Advanced Sharing Settings (on the left-hand side)

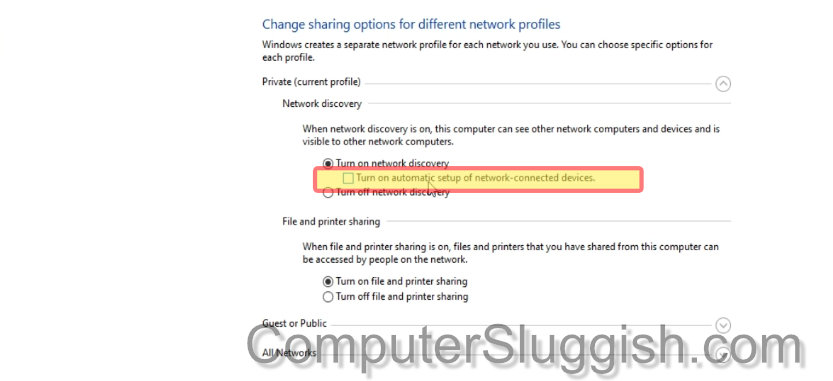
3. Expand ‘Private’ > Untick ‘automatic setup of network connected devices’ > Press ‘save changes’

4. Remove any unwanted network devices from PC > Restart PC (devices should be removed and not auto-connect or set up)
I hope the above guide has helped stop the automatic setup of network connected devices being added to your Windows 10 computer if you enjoyed this guide and found it helpful then we are sure you would like our other Windows 10 guides.


