

How To Download & Install Quicktime In Windows 10
In this post, we will be showing you how you can install Quicktime 7 in Windows 10 onto your PC or Laptop.
Quicktime is no longer supported by Apple but you can still install Quicktime and use it like normal. Just keep in mind that you might encounter the odd problem as its not been kept up to date! Below we have listed the steps on installing it.
Installing Quicktime 7 In Windows 10:
1. First, you need to go here and download Quicktime
2. Once downloaded you now need to run the setup file
3. Follow the on-screen steps then select “Typical“
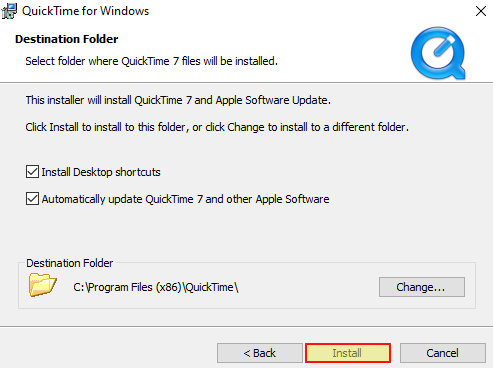
4. Now choose if you would like to add a desktop shortcut and if you would like to automatically update Quicktime 7 (however Quicktime is no longer receiving updates) >Choose where you would like to install QuickTime then click “Install“
5. Once installed you will then be able to launch QuickTime 7 in Windows 10
That’s how you install Quicktime 7 onto your Windows 10 computer. Using Quicktime brings back memories to us!
Also, if you liked this post then we are sure you will like our other Windows 10 posts here.