Removing Skype From Windows 10
In this Windows 10 post, we will be showing you how to uninstall Skype from your PC or Laptop.
If you no longer use Skype and want to completely remove it then it’s fairly easy enough to do, and don’t worry if you do want Skype back on your computer again it’s also easy enough to do that. Below we have listed the steps for removing Skype.
Uninstalling Skype From Windows 10:
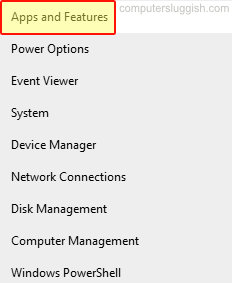
1. Right-click the start menu icon and select “Apps and Features“

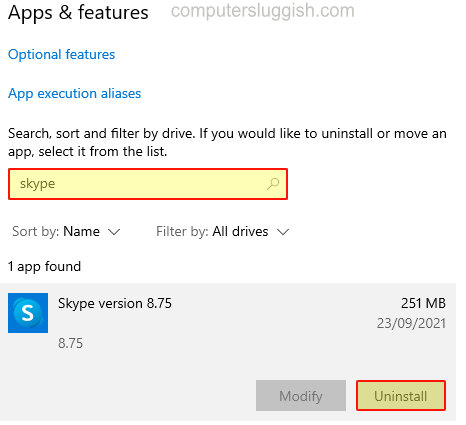
2. In the search box type “Skype” and select it
3. Now click the “Uninstall” button then “Uninstall” again

4. Now click “Yes” to the message saying “Are you sure you want to completely remove Skype and all of its components?“
That’s it you have now removed Skype from your Windows 10 computer. Like we said you can reinstall Skype again if you do want it back.
If you liked this post and found it helpful then we are sure you will like our other Windows 10 posts here.


