Windows 11 Graphics Performance Preference Change To High
If you are trying to optimize your Windows 11 PC for gaming then ensure that all your games are running in High performance.
Within the graphics performance options is a great place to start in making your PC games run a lot smoother within Windows 11. By making your games run in high performance you will be allowing your games to use maximum power and more power means your games will run better.
There is another graphics performance option which is Power Saver. This is great if you are trying to save power or improve how long your laptop battery lasts without going flat, but not great at getting high FPS and performance in games.
So in this post, we will be showing you how you can check to make sure your games are using high performance within the graphics settings.
Changing & Adding Games To Graphics Performance Preference In Windows 11:
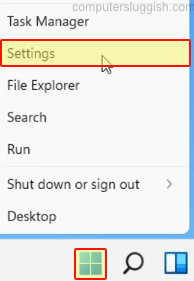
1. First you need to right-click the Start menu icon and click “Settings“

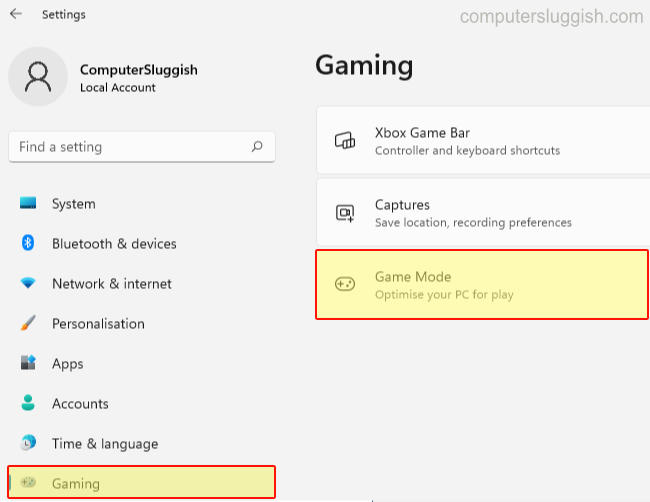
2. You will now see a “Gaming” option in the left menu so click on this > Now select “Game Mode“

3. Click on “Graphics“

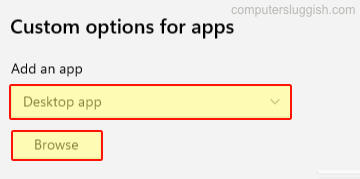
4. Select “Desktop app” in the dropdown then click “Browse“

5. Browse for the games .exe and click “Add“
6. Now find the game in the list and click on it > Select “Options“
7. Choose “High performance” then click Save

There you have it you have now changed the Windows 11 graphics performance for your games. It will also tell you the graphics card you are using, so you can ensure you are using the correct graphics card.
You might have also noticed that there was a game mode option before you clicked on Graphics. If you enable this it can also help with your game’s performance in Windows 11.
If you found this post helpful then you should check out our other Windows 11 guides here.


