Did you know you can easily add an exception to Windows Defender? If you are having difficulties with a program or game connecting to the internet, Windows Defender blocking apps, or Windows Defender blocking downloads, then you will want to add exclusion to Windows Defender as I show you how to do in this guide.
If you have read that you should instead turn off Windows Defender this is incorrect, as when you turn on Windows Defender you will then receive the same error again.
Microsoft Defender has been around for some time now and comes preinstalled with Windows 10 and Windows 11. It does a great job of protecting your Windows system. But if you did want even more advanced security features and settings then you can always install a third-party security program instead. But personally, I feel Windows Defender has everything I need.
So when it comes to using Microsoft Virus protection there are a few things that you need to know, like how to add an exclusion to Windows Security. So I have listed an easy-to-follow step-by-step that you can follow below on how you can do this.
Table Of Contents
Should there be exclusions in Windows Defender?
If you have added some exclusions in Windows Defender then yes there should be. But if you have not then no there won’t be any exclusions within Microsoft Windows Defender.
If you want to know where you can find exclusions in Windows Defender then you can do this by:
1. Opening Windows Security > Go to Virus & threat protection
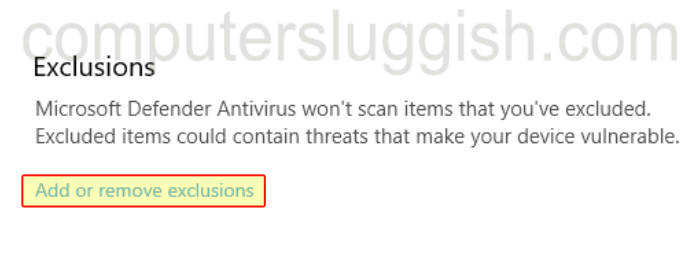
2. Select Manage settings under Virus & threat protection settings > Now select Add or remove exclusions
3. You will now see a list of all the exclusions in Windows Defender

How to add exclusion to Windows Defender
Below are the steps to add exceptions or exclusions to Windows Defender using Windows Security.
1. First, you need to open the start menu and search for Windows Security then open it
2. Now select Virus & threat protection
3. You will now see Manage settings under Virus & threat protection settings and you need to click on this

4. Now click on Add or remove exclusions

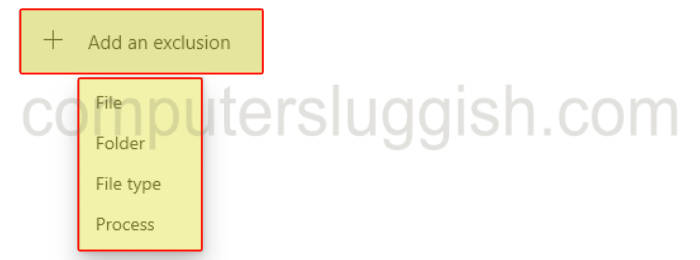
5. You will see a button that says Add an exclusion so click the button
6. Choose one of the options from the following exclude list:
- Microsoft Defender exclude Files – Select the file, program, or game that you would like to add to the Windows Defender exception list.
- Microsoft Defender exclude Folder – Select the folder that you would like to add to the Windows Defender exception list. This will also include all subfolders that are within that folder.
- Microsoft Defender exclude File type – Input the file extension that you would like to add to the Windows Defender exception list. You can either add it like .txt or without the . (so txt for example).
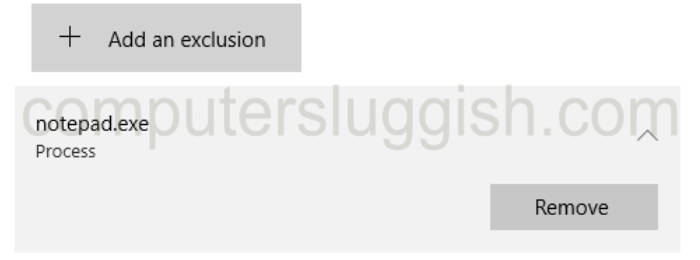
- Microsoft Defender exclude Process – Enter the process that you would like to add an exception to Windows Defender for. So for example, type the name used in Task Manager like Notepad. I would add notepad.exe to ensure you add the file extension.

7. Once you have added an option you will then see what you selected within the exception list.

8. If you decide later down the line you would like to remove exclusions then you can do so by selecting the remove button under each exception.
I hope the above guide has helped show you how to add an exception to Windows Defender in Windows 10/11.
As I said, it’s a fantastic built-in added security for Windows. And now you are able to also add exclusions to the threat protection you will find it even more useful. And doing so will also get rid of annoying messages like the “Windows Defender application control to block this app”.
If this guide helped you out then we have more Windows guides here you can check out.


