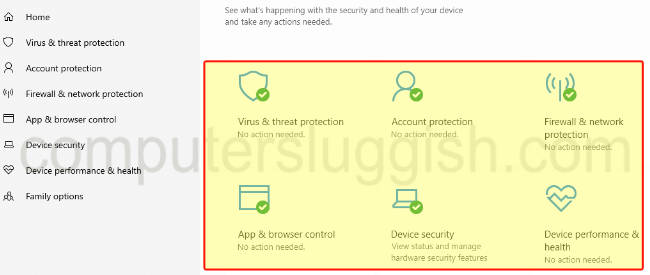
Microsoft Windows Defender comes as part of Windows 10 and Windows 11 as threat protection, to help protect the operating systems from different types of threats. But not everyone wants to use threat protection and would prefer to disable Windows Defender. So below I have listed different ways on how you can permanently disable Windows Defender in Windows 10/Windows 11.
Although I would not advise you to disable Windows Defender as it helps keep Windows protected from security threats, it can easily be done within the Windows registry as I show below. Or we can disable Windows Defender by installing a third-party security program.
If you are looking to disable Microsoft Defender because it’s using high CPU, Memory, or Disk usage then check out our guide here on how to fix this first.

Table Of Contents
Should I disable Windows Defender?
If you are looking to disable Windows Defender because you are replacing it with another threat protection security program, then yes it’s fine to disable it.
However, if you are going to permanently disable Microsoft Windows Defender and not going to replace it with alternative threat protection, then I would advise against this as your system could easily become infected.
You could always just turn off Windows Defender temporarily by turning off the real-time protection. This is great if you are just troubleshooting or just want it off for a short period of time.
Does disabling Windows Defender improve performance?
Yes disabling Windows Defender would improve performance as every security software, program, game or anything you run on a Windows 10/11 computer will consume system resources.
Also, while Windows Defender is scanning your system it will consume even more resources affecting the performance of your computer.
So if you are looking to permanently disable Windows Defender to improve performance I would recommend installing a lightweight security program instead. There are many different types of security programs available online, some being lighter than others.
How to disable Windows Defender
Below I have listed the different ways that you can disable Windows Defender in both Windows 10 and Windows 11.
Method 1: Third-party security
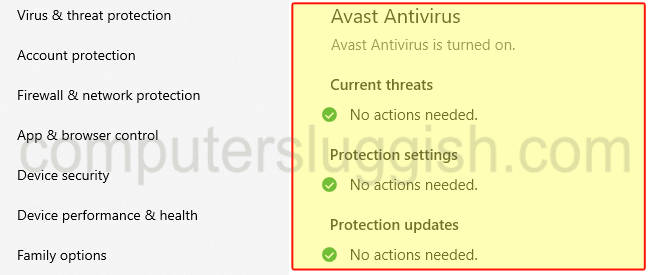
If you want to deactivate Windows Defender then installing a third-party security program will disable Windows Defender from running on your system.
It will detect that Windows 10/11 is already protected by a different security program, as you can see in the screenshot below.

Method 2: Registry
If you would like to permanently disable Windows Defender then we can do this within the Registry Editor. Just be careful when editing the registry.
1. First, open the start menu and search Windows Security and open it
2. Now select Virus & threat protection and click on Manage settings
3. Toggle Tamper Protection to Off

4. Now open the start menu and search for Registry Editor and open it
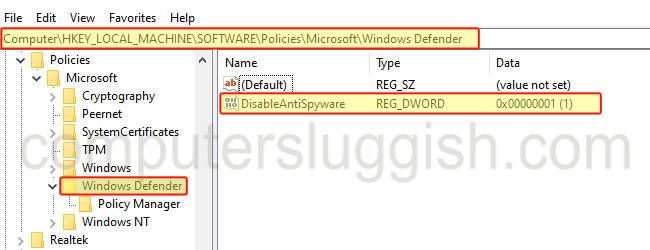
5. In Registry Editor go to the following location:
Computer\HKEY_LOCAL_MACHINE\SOFTWARE\Policies\Microsoft\Windows Defender6. Right-click in the empty space and select New > Click on DWORD (32-bit) Value
7. Type DisableAntiSpyware then press Enter
8. Right-click on DisableAntiSpyware and select Modify

9. Change Value data to 1 then click OK > Restart Windows
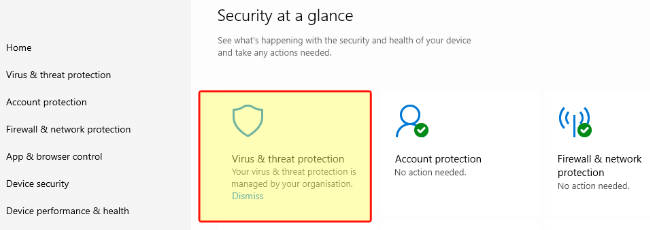
10. You will now notice that Windows Security says ” Your virus & threat protection is managed by your organization“, meaning that we have successfully disabled Windows Defender in Windows 10/11.

I hope the above guide has helped you permanently disable Windows Defender in Windows 10/11.
If you do decide you would like to enable Windows Defender then you will need to either uninstall the third-party security program if you did method 1, or if you used method 2 then you can just change the value data back to 0.
We have plenty more Windows guides here if you want to check them out.


