

In this Windows 10 guide, I will show you how to change keyboard delay in Windows 10. This is the speed at which Windows 10 detects your keystrokes. Whether you are fast or slow at typing on a keyboard, you might want to adjust the rate at which Windows 10 detects your keystrokes. Luckily we can change the repeat delay and repeat rate to suit your typing style.
Changing Windows 10 keyboard speed to slow or long means when you press a key it may not be detected and changing it to fast and short means that all of your keystrokes will always be detected when typing.
Will Keyboard repeat delay & rate affect everything?
Yes, changing Windows 10 keyboard repeat delay and repeat rate settings will affect everything that you use your keyboard to type in within Windows 10. The only thing that it might not have an effect on is typing within some games.
How to change keyboard character repeat delay & rate
Below are the steps on how to set your keyboard repeat rate and repeat delay in Windows 10.
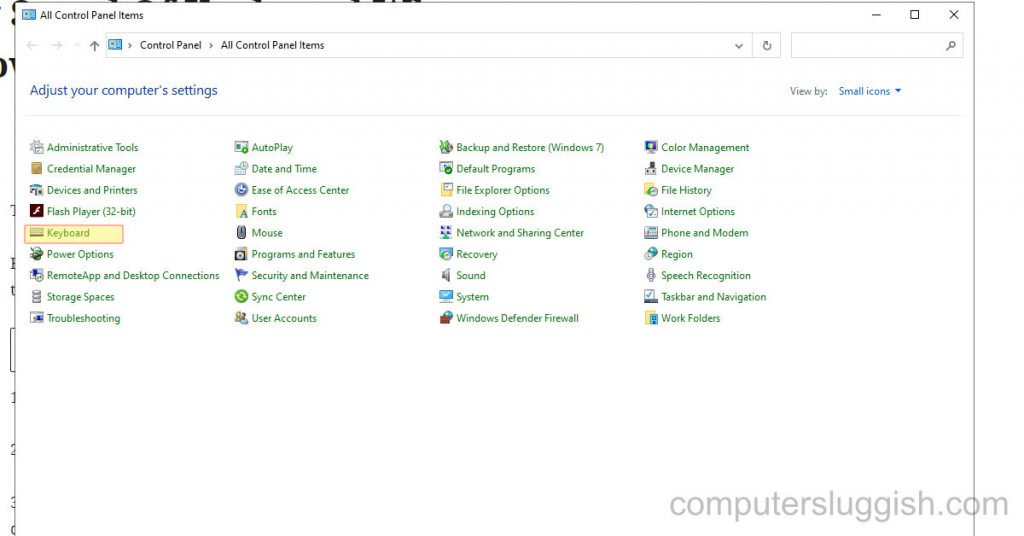
1. Open Windows 10 start menu
2. Search Control Panel and open it
3. Click on Keyboard (If you cannot see this option then you need to change View by to Small icons).
4. Now select the speed tab > Change Repeat Delay & Repeat Rate to your chosen speed by moving the sliders up and down.
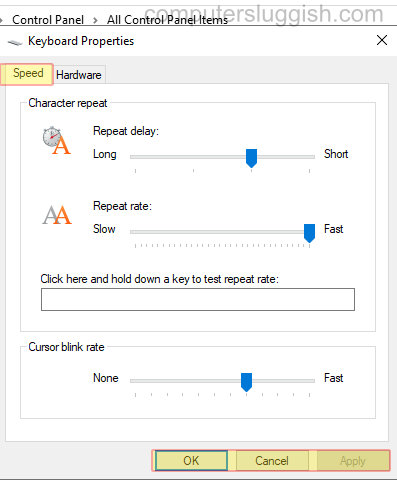
4. Once you are happy press Apply > Press OK
I hope the above guide has helped you change Windows 10 repeat delay and rate for your keyboard.
If you found this guide helpful and enjoyed it then we are sure you would like some of our other Windows guides.