

Restore To A Working Point!

This guide will show you how to create a system restore point in Windows 10 on your PC or laptop so that you can restore your PC back to how it was when you created the system restore point this is great because if anything goes wrong you can restore back to a working point.
System restore can be a lifesaver, for example if your PC crashes or your system goes wrong due to a bit of software or a driver update you can then use System Restore to restore your Windows 10 back to its last working state.
****Top Tip****
It is always worth creating a restore point if you are going to be making any changes to your PC or Windows 10 settings.
To Create A System Restore Point:
Below are the steps for creating a system restore point in Windows 10.
1. Type ‘System Restore’ into Windows search box (Bottom left-hand corner) > Click on ‘Create A Restore Point’

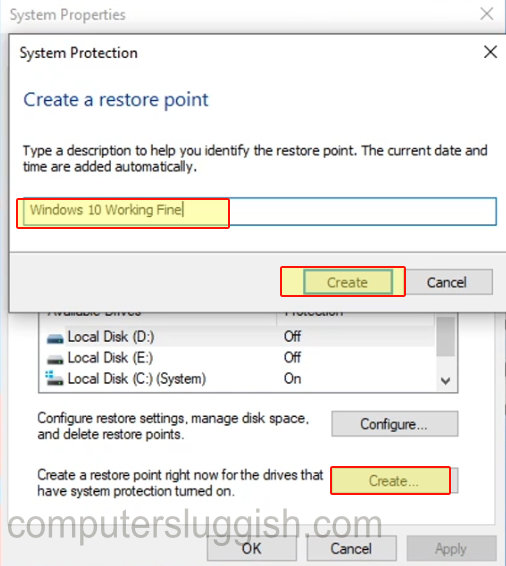
2. Click on ‘Create’ (Next to ‘Create a restore point right now….)
3. Choose a name for your restore point (E.g. Windows 10 working fine) > Press Create (You should now have successfully created a restore point)> Press Close
****Top Tip****
If you don’t have ‘Protection’ on the drive you want to restore then you won’t be able to create a system restore point. You can enable this by clicking on ‘configure’ and turn on system protection