
Fix Realtek Driver Issues!
Realtek Audio Drivers are probably the most commonly used sound driver on the Windows 10 operating system. This guide will show you how to uninstall the Realtek audio drivers on your Windows 10 PC or laptop. Sometimes you may encounter issues with your sound. So by uninstalling the Realtek drivers and reinstalling them to your PC you may be able to solve your problem.
If you were to remove an audio driver as I show you in this guide, or if you were to install a new sound card/sound device to your computer then Windows will choose the best audio driver it can detect for your system and install it for you. But you can also still install a new audio driver of your choice, which will override the driver that Windows chose for you.
You need to have a sound driver installed on your Windows 10 computer to be able to hear sound. If you cannot hear sound from your computer then it could be an issue with the driver or it could be that you do not currently have a sound driver installed. But as I said above, usually Windows is pretty good at detecting your hardware and should have installed a driver for your sound card automatically.
Why Remove Realtek Audio Driver?
If you have been having issues with your sound in Windows 10 for example:
- Sound fuzzy
- Sound glitchy
- No sound
- Static sound
Then uninstalling the Realtek audio driver and using Windows 10 recommended audio driver could help resolve the issue. Or you could try installing the Realtek driver again.
Can You Install Realtek Audio Driver Again?
Yes, you can install the Realtek audio driver again after you have uninstalled it from your Windows 10 computer.
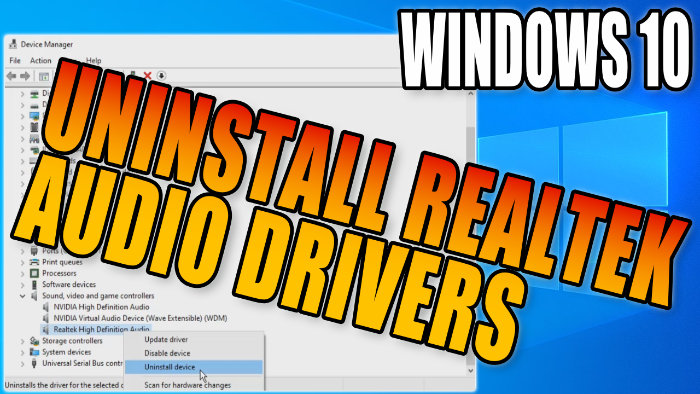
How To Manually Uninstall Realtek audio driver:
Below are the steps to manually remove the Realtek audio driver from your Windows 10 computer.
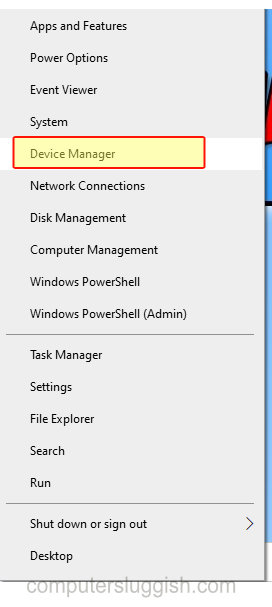
1. Right-click on the Windows start menu icon (In the bottom left-hand corner of the screen) > Open Device Manager
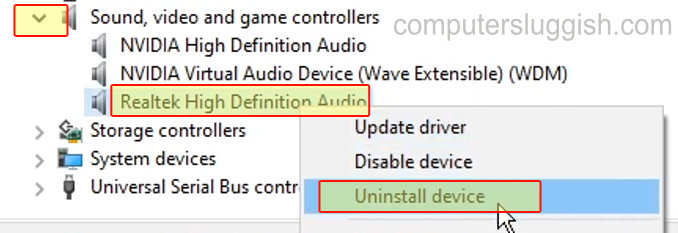
2. Go to ‘Sound, video and game controllers‘ > Expand the drop-down menu
3. Right-click on ‘Realtek High Definition Audio‘ > Click on Uninstall device
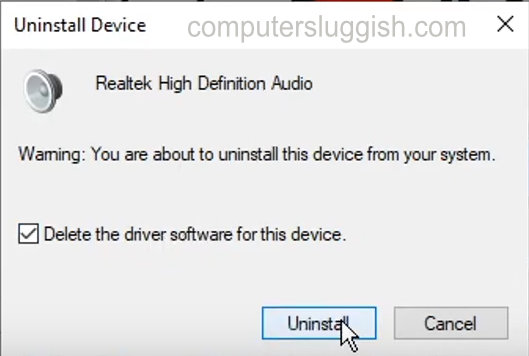
4. Tick the box that says ‘Delete the driver software for this device’ > Press Uninstall
5. Press Yes to restart your PC (make sure everything is saved before restarting your PC and it may be worth creating a system restore point)
I hope the above guide has helped you remove the Realtek audio drivers from your Windows 10 computer. If you found this guide helpful and enjoyed it then I am sure you would like all of our other Windows 10 guides.