
Compress Picture File Size For Emails Without Third Party Programs
In this guide, we will be looking at the fastest way to reduce image file size in Windows 10, so you can get back to sending the image in an email or save disk space.
If you have got a couple of images or pictures that you want to quickly change the file size of, then this can be done using Paint on your Windows 10 PC or laptop.
This is a quick and easy way of making image files smaller, which we show you how to do in the steps below.

Paint comes preinstalled with Windows 10 and is a great free program to edit images.
So you can use this Windows app to quickly reduce image sizes without needing to download third-party software.
Why make image files smaller?
You may need to make your image file sizes smaller to save space if transferring over to a USB or if you are trying to attach them to an email.
It is really frustrating when you try to attach your picture to an email and it says “File size too large“, so this is a fast and easy way around that problem.
Doing the below method can sometimes reduce the file size of a picture or image by up to half the original size if you are lucky!
Or at least will save you time as if you attach a large file to an email it can take forever to upload!

Will I lose image quality if decreasing file size?
Reducing the image file size is basically compressing the image, so it is definitely worth making a backup of your pictures and images before doing the below method, just in case it does make a change to the picture quality that you don’t like.
When we tried it there wasn’t any difference made to our images, but that may not be the case for you, look at the two images below that we used for our featured image on this post you cannot see the difference in quality or I can’t anyway.
But yet they size difference for each image is huge, and it only took seconds to decrease the file size.
So even if there is a slight decrease in quality this is still a quick way to make the image files smaller to attach to emails for example, so if you are not worried about the quality too much then that’s fine.
How to change or reduce the file size of a picture and image
So if you are happy to go ahead and have backed up your images then follow the steps to reduce image size in Windows 10:
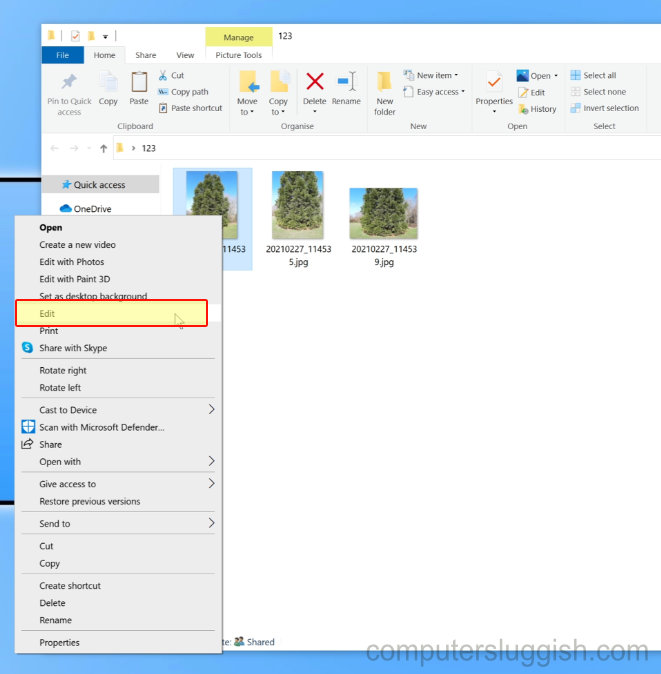
1. Find the picture you would like to change or reduce the file size of in File Explorer
2. Right-click the image > Click on Edit
3. Now the picture should be open in Paint > Click on File in the top left-hand corner > Click on Save
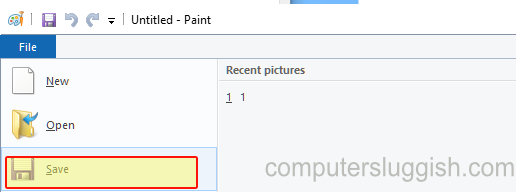
4. You will now notice that the file size of your picture or image has been reduced
How to check image file size in Windows 10
Once you have compressed the image you can double-check the file size of the picture:
Method one:
Click on the picture in File Explorer and at the bottom of File Explorer it will say 1 item selected and the size of the image

Method two:
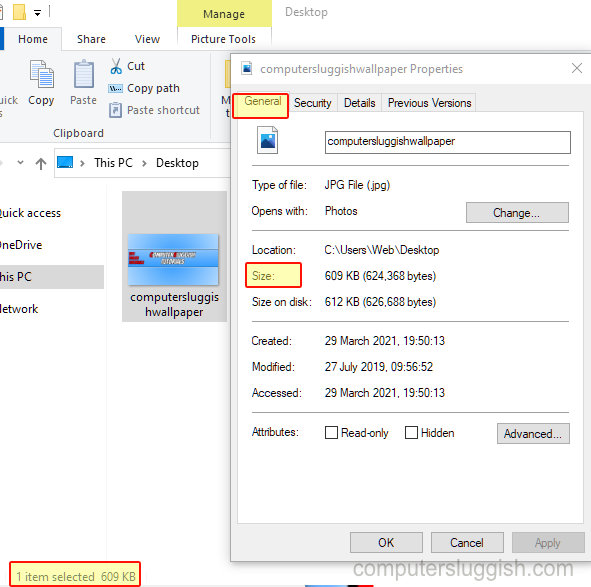
Right-click on the image in File Explorer > Properties
Under the General tab, you will see the size of your picture
That is literally how easy it is to change the file size quickly on your Windows 10 PC using Paint.
But as we said above, this is a quick and easy way to compress image files so you can get them attached to an email without getting an annoying error message!
If this guide helped you out then check out our other Windows 10 tutorials.