

Disable Laptop Touchpad And Use Mouse Only In Windows 10
In this post, we will be taking a look at how you can disable the touchpad that comes with a laptop.
The touchpad is a great feature added to a laptop that allows you to move the cursor around in Windows just like a mouse. However, if you have a mouse that you like to use and have no need to use the touchpad, or perhaps you keep accidentally touching the touchpad and want it disabled, then this can easily be done. Below we have listed the steps for disabling a laptop touchpad.
Disabling A Touchpad On A Windows 10 Laptop:
1. First you need to right-click on the start menu icon > Then click “Device Manager“

2. Now expand “Mice and other pointing devices“
3. Make sure you have unplugged and disconnected all mice plugged into your laptop > Now right-click on your Touchpad (might say Clickpad) > Then click “Properties”

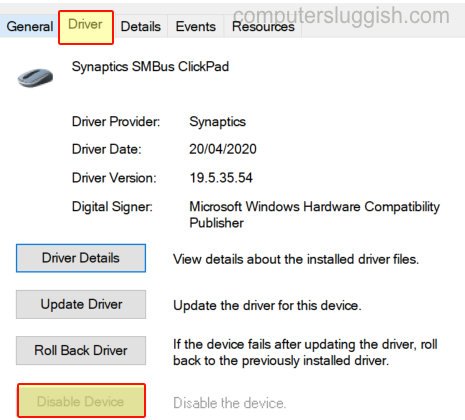
4. Select the Driver tab > Click on Disable Device
5. On the pop-up window that says “Disabling this device will cause it to stop functioning. Do you really want to disable it” select “Yes“
There you have it that is how you can disable your laptop’s touchpad in Windows 10. If you do change your mind and want to enable your touchpad at a later date then you can do the above but when you right-click your touchpad in Device Manager select “Enable device“.