

Fix Riot Vanguard Being Blocked In Windows Defender Firewall
In this post, we will be showing you how to add Riot Vanguard to the allow list in Windows Defender.
If you have been having problems with Riot Vanguard not working correctly and getting error messages, then the most likely cause could be that it is not being granted internet access through your firewall.
We have listed the steps below on how you can allow Riot Vanguard internet access on your Windows 10 PC or laptop. If this does not fix the problem you are facing with Vanguard then you might need to reinstall Vanguard.
Add Riot Vanguard To Windows Defender Firewall:
Below are the steps for adding Riot Vanguard to Windows Defender Firewall.
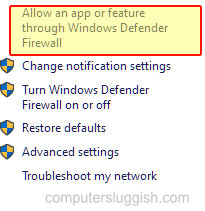
1. Open the Start menu and search “Windows Defender Firewall” then open it

2. Now click on “Allow an app or feature through Windows Defender Firewall“
3. In the list find “Riot Client” > Now click the “Change settings” button > In the “Private” column tick the checkbox next to Riot Client
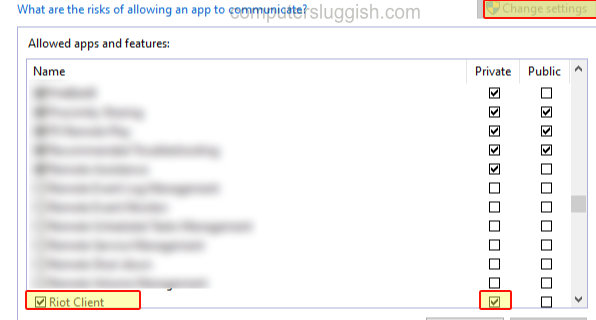
4. If it’s not listed then click on “Allow another app…” and browse for Riot Client

There you have it that is how you add Riot Vanguard to the Windows Defender Firewall. If you are using a different firewall then you will also need to add Riot Vanguard to that as well for it to be able to successfully do its job, so you can play your Riot Games like Valorant.