Customise Shortcut Icons In Windows 10
You will have probably noticed that when you create a shortcut for a program on your Windows 10 PC it comes with a default icon, so if you like to customise and change your icons then this can easily be done.
Some shortcuts you go to customise (such as Firefox & Google Chrome) will have a couple of icon options to choose from and if you really wanted to you could even change them to system icons.
If you have created your own custom icon then you can change them to your chosen image.
To change shortcut icons that have icons to choose from:
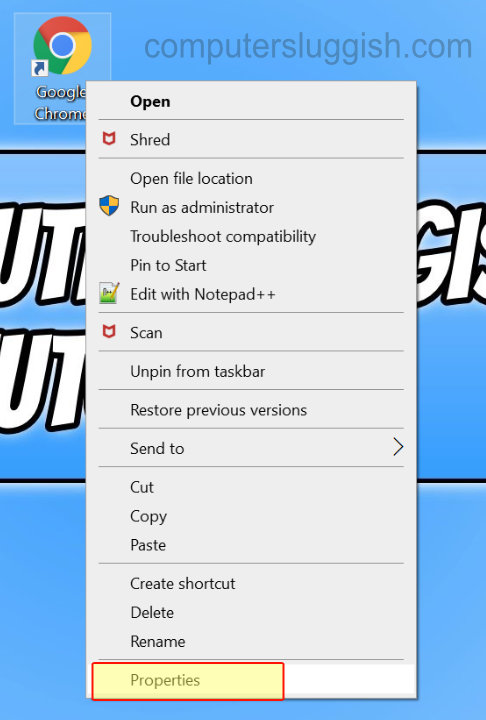
1. Right click on your chosen shortcut > Properties

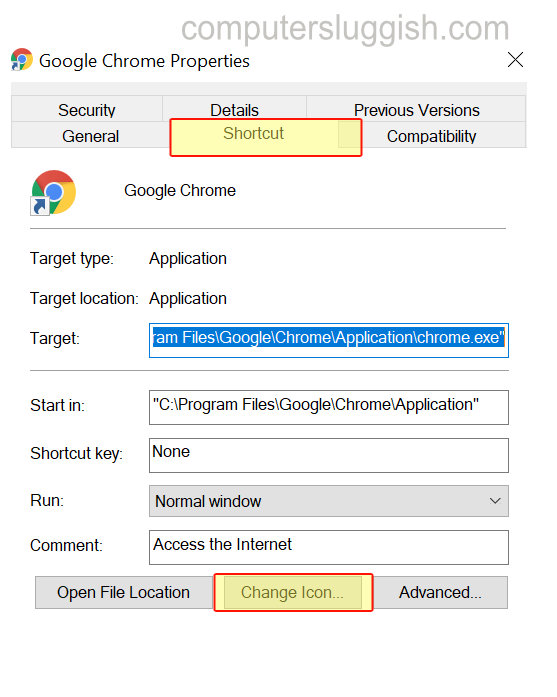
2. Select the Shortcut tab > Click on ‘Change icon’ > Select the icon you want to change to > Press OK > Press Apply (Your icon should now change)


To change shortcut icons to system icons:
1. Right click on your chosen shortcut > Properties
2. Select the Shortcut tab > Click on ‘Change icon’ > Click on Browse > Go to the following directory:
- C:\Windows\System32
3. Look for the shell32.dll file and double click on it (system icons should now display)

4. Select the icon you want to change to > Press OK > Press Apply (Your icon should now change).
****Top Tip****
If you have created your own custom icon or have some saved then when you click browse just simply find the folder where your saved icons are. These are usually a .dll .ico or .exe

