

In this guide, I will show you how to change your screen to turn off after a certain amount of time in Windows 10, if you have a habit of leaving your screen on when you move away from your computer for a long period of time then by setting a timeout for your screen can not only save power but also could increase the life of your display and stop screen burning.
Luckily in Windows 10 Power & Sleep settings, we can set the monitor screen to turn off after a certain amount of time when your screen is idle or inactive. although you may want to adjust the length of time before the screen turns off or you might not want it to turn off at all, Below I have listed the steps in changing the screen timeout in Windows 10.
Change screen turn off time
Below are the steps for changing how long until the screen turns off in Windows 10 or as I already said you can turn the option off so your display always remains on.
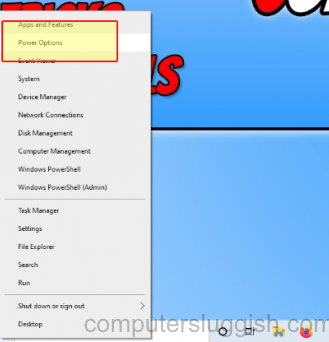
1. Right-click on the Windows start menu icon (bottom left-hand corner of your screen) >
Power options
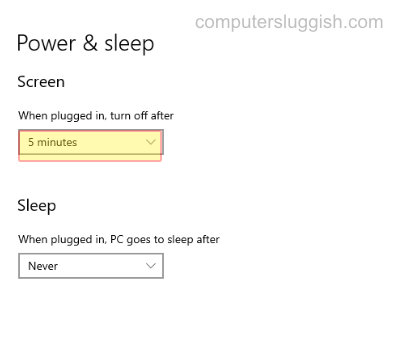
2. You will see an option under ‘Screen’ which says ‘When plugged in, turn off after’ > Click drop-down arrow > Select chosen time
I hope the above guide has helped you change the amount of time it takes to turn off your screen in Windows 10 this could help save on power but also help prolong your display from screen burn if you enjoyed this guide and it helped then we are sure you would like some of our other Windows 10 guides.