In this Windows 10 guide, I will show you how to change when your computer goes into sleep mode or if you would prefer how to disable sleep mode. You can choose from different times before your PC goes into sleep mode to suit your needs.
Windows 10 sleep mode is a low power mode that your PC or laptop will go into if you haven’t used it after a set amount of time. Sleep mode is a great power saving mode if you do not want to turn your PC off and will save battery on a laptop it also enables you to power back on your computer a lot quicker than hibernation mode.
Table Of Contents
Enable sleep mode in Windows 10
Below are the steps for enabling sleep mode and changing the time in which your computer enters sleep mode.
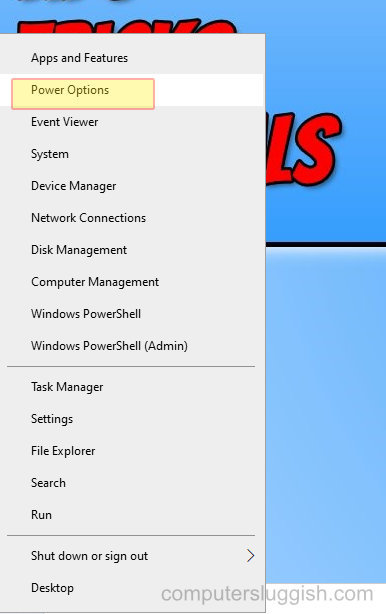
1. Right-click on the Windows 10 start menu icon (bottom left-hand corner of your screen) > Power options

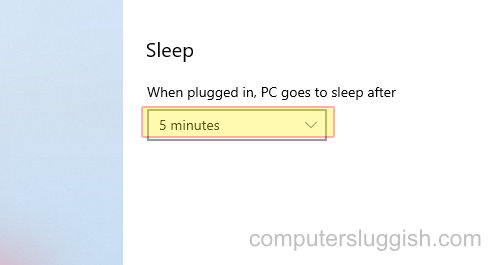
2. You will see an option under ‘Sleep’ which says ‘When plugged in, PC Goes to sleep after’ > Click drop-down arrow > Select chosen time

Disable sleep mode in Windows 10
Below are the steps for stopping your computer from going into sleep mode in Windows 10 it is within the same location as the above steps.
1. Right-click on the Windows 10 start menu icon (bottom left-hand corner of your screen) > Power options
2. You will see an option under ‘Sleep’ which says ‘When plugged in, PC Goes to sleep after’ > Click drop-down arrow > Select Never
I hope the above guide has helped you turn on or turn off sleep mode in Windows 10 as I said this power setting is a great way to help prolong the battery life of your laptop if you have a habit of leaving it idle for long periods of time and can bring Windows 10 back to life faster than turning on your computer.


