In this guide, I will show you how to enable the Xbox game bar in Windows 10 on your computer. The Xbox Game Bar can be used for many different things and really does come in handy especially if you enjoy gaming for example it allows you to take in-game screenshots, record gameplay, socialise with friends, monitor your system performance, broadcast, and has many more features.
Once you have enabled the Xbox Game Bar you will be able to bring the overlay up in Windows 10 by pressing Win+G this is also the keybinding to open Xbox Game Bar when in-game or if you have an Xbox controller connected to your computer you can press the Xbox logo on the controller.
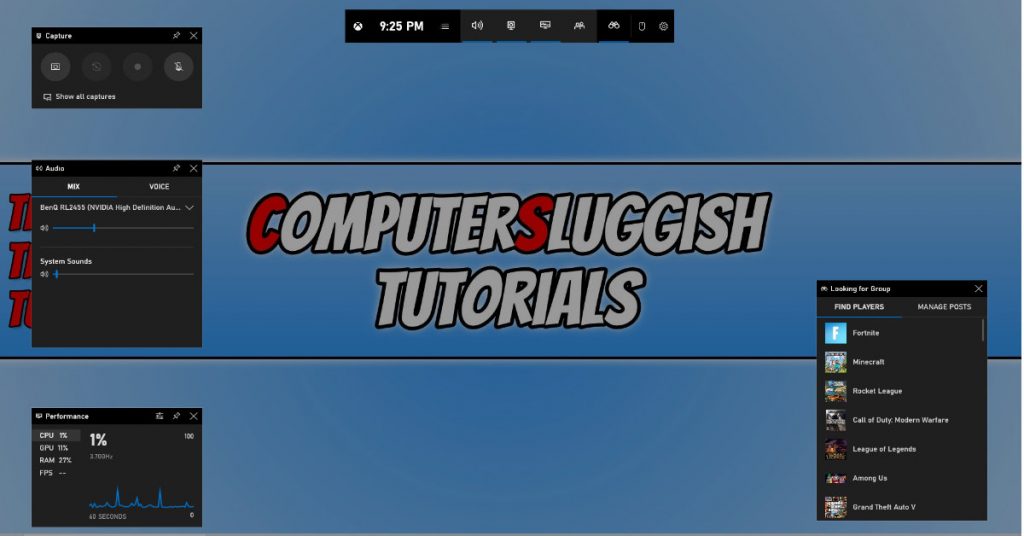
I absolutely enjoy having the Game Bar enabled in Windows 10 as it comes in handy I tend to use the performance monitor and record in-game footage the most but even being able to create a party and chat with friends over VOIP comes in handy especially if you don’t want to install a third-party program like Discord or TeamSpeak.
Related: Disable Xbox Game Bar in Windows 10
Table Of Contents
Xbox Game Bar keyboard shortcuts
Below are the keybindings that you can use to control the Xbox Game Bar within Windows 10 knowing these really can help.
1. Open Game bar: Win + G
2. Take Screenshot: Win+Alt+PrtScr
3. Record that: Win+Alt+G
4. Start/Stop recording: Win+Alt+R
5. Microphone on/off: Win+Alt+M
6. Start/Pause broadcast: Win+Alt+B
7. Show camera in broadcast: Win+Alt+W
Enable Xbox Game Bar
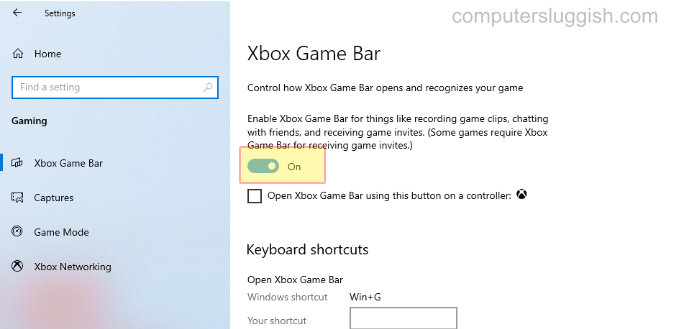
Below are the steps for enabling Windows 10 Xbox Game Bar.
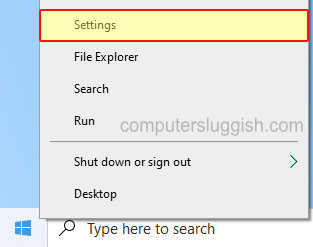
1. Right-click on the Windows 10 start menu icon > Now click Settings
2. Now click the Gaming option
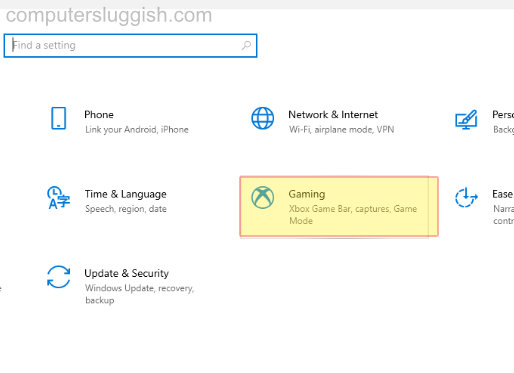
3. Under “Record game clips, screenshots and broadcast using Game Bar” click to toggle to ‘On’
I hope the above has helped you enable the Xbox Game Bar on your Windows 10 computer like I said if you do a lot of gaming then it is defiantly something you would probably find handy if you enjoyed this guide and found it helpful then we are sure you would like our other Windows 10 guides.
