
Keep your Files Hidden and Private!
Hiding files in Windows 10 can be done very easily and can be extremely handy if you would like a certain file to not be easily found.
Hiding files in Windows 10 can be achieved without the need of having to download additional software to your PC or laptop.
Although someone can still view the hidden files if they have the ‘Show hidden folders, files and drives’ option enabled, it still means you can kind of keep your files hidden if you are; allowing someone to quickly use your system, doing a remote screen share of your desktop, or maybe even recording or capturing your screen.
How To Hide your Files in Windows 10:
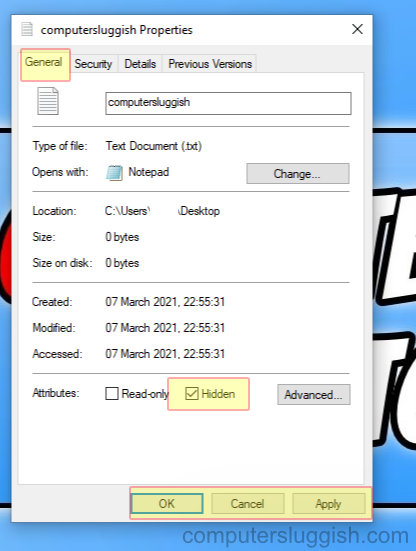
1. Find the file that you would like to hide > Right click on the file > Properties

2. Select the General tab
3. Tick the box for Hidden (next to attributes) > Press Apply > Press OK (your file will now become hidden)
If you have don’t have the ‘Show hidden files, folders or drives’ option enabled then you will no longer be able to see the hidden file, even though the file is still in the location where you left it.
There are two ways of being able to access the file again:
Method 1:
- Type the directory for the hidden file in File Explorer > Press enter and it will open the hidden file
Method 2:
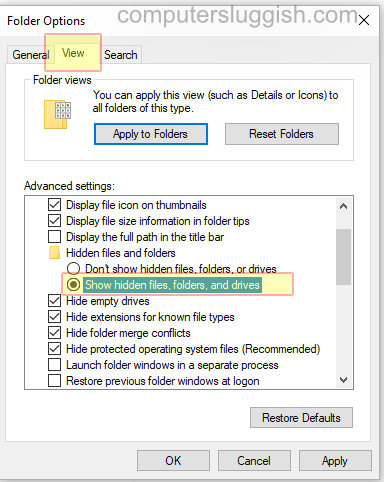
- Open File explorer > Click the View tab
- Click on Options (you will now have the Folder Options window open)
- Select the View tab > Tick the box for Show hidden files, folders and drives
- Click Apply > Press OK

****Top Tip****
If you want the file no longer be hidden then you can easily show the file again