

Rebuild Index To Speed Up Search Results
This Windows 10 tutorial will show you how to re index search locations on your PC or laptop.
Sometimes for no apparent reason Windows 10 indexing will stop working. This means any new files on your PC or Laptop will not be indexed, so it will take longer for you to search for those files when using the Windows 10 search.
The good news is you can actually run a re index, which means Windows 10 will start from scratch and re index your system.
To make Windows 10 re index your entire PC:
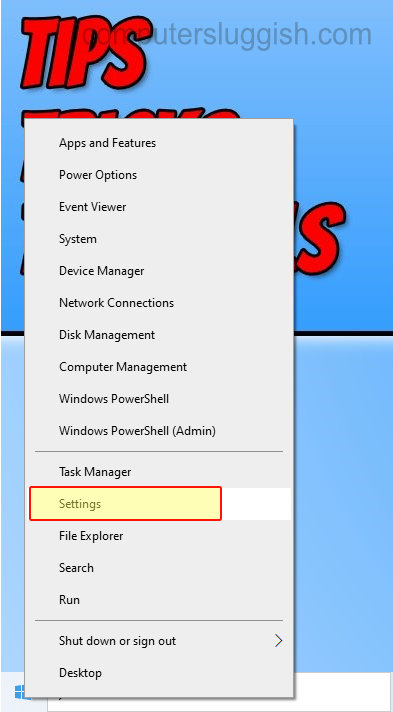
1. Right-click the Windows 10 start menu icon (Bottom left-hand corner) > Settings > Search > Select Searching Windows tab (Left-hand menu)

2. Click on ‘Advanced Search Indexer Settings’ > Click on Advanced

3. Click ‘Rebuild’ (this will then delete and rebuild the Windows 10 index)
