Disable Remote Registry!
This Windows 10 tutorial will show you how to turn on or off the remote registry on your PC or laptop.
The remote registry is a service in Windows 10 that allows users to connect to your PC or laptop remotely to make changes to your registry.
If you have this service disabled then it can stop some software from working correctly on your Windows 10 system, if the software you are using requires remote registry access.
It’s also worth mentioning that if you do decide to disable this service then any other services that require remote registry will no longer work and just fail to start.
To turn on remote registry in Windows 10:
1. Open the Windows 10 start menu and type “services” > Open Services app (You will now see a list of all the services that are installed on your Windows 10 system)
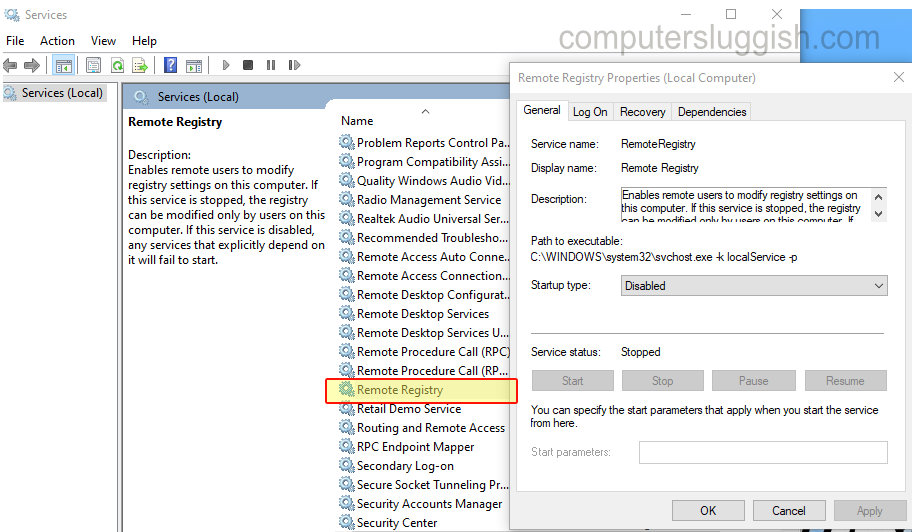
2. Scroll down and find “Remote Registry” > Double-click on it
3. Click on the drop down menu next to ‘Start up type’ and select “Automatic” > Press apply > Click start (this will start the remote registry service) > Press OK
To turn off remote registry in Windows 10:
1. Open the Windows 10 start menu and type “services” > Open Services app (You will now see a list of all the services that are installed on your Windows 10 system)
2. Scroll down and find “Remote Registry” > Double-click on it
3. Click on the drop down menu next to ‘Start up type’ and select “Disabled” > Press apply > Click stop (this will stop the remote registry service) > Press OK