
Tidy Up Windows Start Menu!
When it comes to the Windows 10 start menu you can end up having far too many shortcuts, and also some shortcuts will no longer work due to the program or game being uninstalled, or the location being changed.
The good news is you can actually quite easily remove the shortcuts that are no longer needed on the start menu.
There are two locations the shortcuts for your start menu are stored in; One location is for all users and another location is for your own personal user profile. Each location may have different shortcuts.
To remove shortcuts from the start menu:
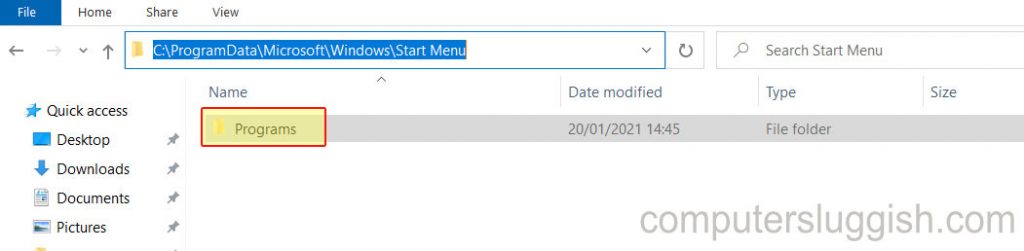
1. The first thing you need to do is to sign in to the user profile that you would like to remove the start menu shortcuts from > Open File Explorer and go to the below path (you may need to show hidden files, folders, and drives):
The below path is the folder that has the Windows 10 start menu shortcuts for all users:
C:\ProgramData\Microsoft\Windows\Start Menu
The below path is the folder for the Windows 10 start menu shortcuts for the current user:
C:\Users\Your User\AppData\Roaming\Microsoft\Windows\Start Menu (replace Your User with the user name you are logged in with)
2. After you have gone to either of the above paths double click on the Programs folder and then right-click on the shortcut you want to remove and press delete
****Top Tip****
You can always open the Start menu > Type in Run > Open the Run app > Type %appdata% to skip the app data folder