

Change Processor Scheduling In Windows 10
In this post, we will be showing you how you can choose how you would like to allocate the processor resources within Windows 10.
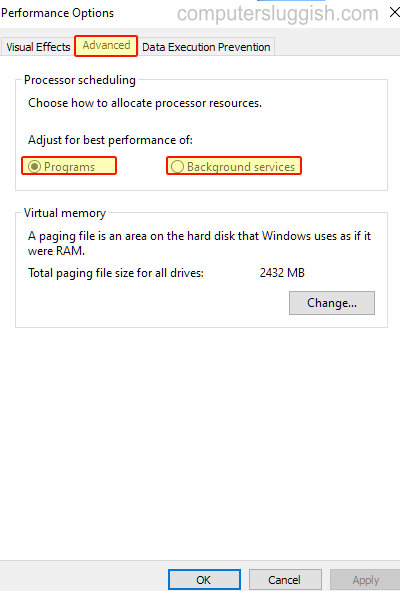
You can choose from two different options; Either Programs or Background services. So depending on what you will be using more on your computer will depend on which option you will want to choose. We have listed the steps on how to do this below.
Allocating Processor Scheduling In Windows 10:
1. Open the start menu and search “Adjust the appearance and performance of Windows” then open it
2. Now click the “Advanced” tab
3. Under “Adjust for best performance of” choose either Programs or Background services then click the “Apply” and “OK” button
There you have it that is how you can choose where you would like to allocate your processor resources in Windows 10.
Check out our other Windows 10 posts here.