

Make Windows 10 Run In High Performance Power Plan Mode
In this Windows 10 guide, I will be showing you how you can change your power settings to high performance. This is something I always do as soon as I install Windows, I then usually enable the Ultimate performance power plan in Windows 10 later on as it requires some code to add it to Windows.
Changing the Windows 10 power settings to high performance will allow your system to use more power, allowing your PC or laptop to run faster. This will also improve how well your games and programs run, but just keep in mind if you are using a laptop then the battery life will run out a lot quicker if you don’t have your laptop plugged into the mains.
Enable High Performance Windows Power Plan
See below the steps to change power settings on windows 10 to the high performance power plan.
1. Open the start menu and search “Control panel” and open it
2. Now change “View by” to “Small icons” > Click “Power Options“
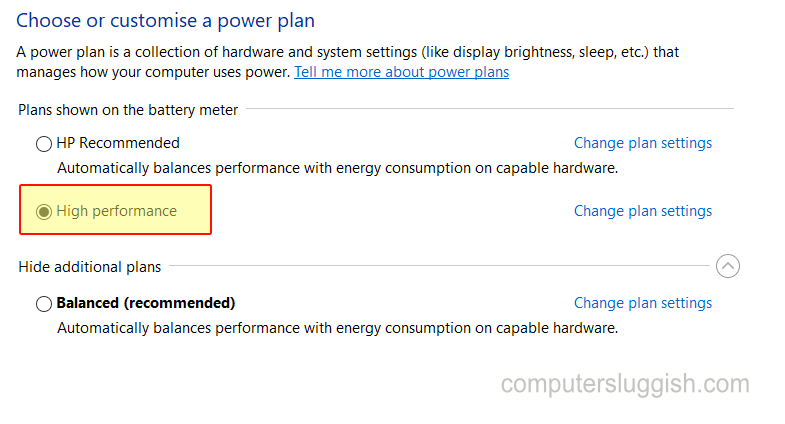
3. Select “High Performance“
There you have it that’s how you can access the power settings in Windows 10 and make the operating system use the high performance power plan, you should now notice an improvement of performance in Windows.
If your computer is missing the power plan then check out this post.