

Change System Clock Time In Windows 10
In this Window 10 post, we will be showing you how to change the time of your PC or Laptop manually.
If you don’t want Windows 10 to connect to the internet to set the time automatically or perhaps you have no internet and need to change the time of your computer, then it can be easily done within the Windows 10 settings. Below we have listed the steps on how to do this.
Windows 10 Changing The System Time:
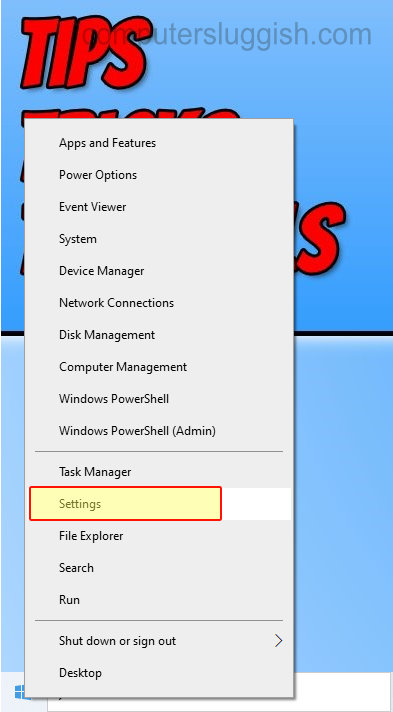
1. Right-click the start menu icon > Click “Settings“
2. Now click “Time & Language” > Select “Date & time” in the left menu
3. Now toggle “Set the time automatically” & “Set the time zone automatically” to Off
4. Click the “Change” button under Set the date and time manually

5. Now choose the correct time under “Time” > Once finished click “Change“

6. Now under “Time zone” ensure yours is correct > If it’s not click the dropdown and select your time zone
That’s how you manually change the time of your computer in Windows 10. If you do connect to the internet and would like to use the internet to set your system time then you can toggle the above options back to ON then Windows 10 will take care of everything.
We have even more Windows 10 posts here that you might like.