Skip to content

ComputerSluggish

  • Home
  • Windows 10
    • Customisation
    • Desktop
    • Gaming
    • Optimise & Maintain
    • Security & Privacy
    • Software & Apps
    • Troubleshooting
  • Windows 11
    • Apps & Software
    • Customise
    • Optimisation & Maintenance
    • PC Gaming
    • Privacy & Security
    • System
    • Troubleshoot
  • Game Room
    • In-Game Guides
    • Nintendo Switch
    • PlayStation 4
    • PlayStation 5
    • Xbox One
    • Xbox Series X|S
  • Android
  • Highlights
Home > Windows Tutorials > Security & Privacy > How To Rename A Local User Account In Windows 10

How To Rename A Local User Account In Windows 10

26 October 202123 July 2021 by ComputerSluggish

Manage Other User Accounts In Windows 10 & Rename A User

In this Windows 10 post, we will be taking a look at how you can rename a local user account on your PC or laptop.

If you have already tried looking within the Windows 10 settings you might have noticed that there is no option that allows you to change an account name. However, there is a way of doing this through the Windows 10 Control Panel, and we have listed the steps below to do this.

****Top Tip****
You will need to be signed in as an administrator to manage another account in Windows 10

Change A Local User Account Name:

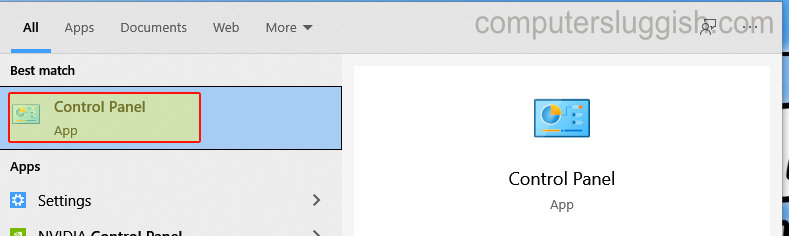
1. Open the Windows Start menu and search “control panel” and open it

2. Now change “View by” to “Small icons” then click on “User Accounts“

3. Click “Manage another account“

4. Now click on the user that you would like to change the username for

5. Click “Change the account name” and give the account a new name then click “Change Name“

This will not change the name of the user’s folder in “C:\Users” (this must remain the same)

There you have it you have now changed the user name of an account for another user in Windows 10. The new name you have chosen will now be displayed on the start menu, Signing in screen, etc.

You can view how to change your user profile picture here.

Check out our latest guides:

  • Fix: V Rising Crashing On PC
  • Fix: Apex Legends Mobile Connection Issues & Errors
  • Fix: Apex Legends Mobile Crashing & Not Launching
  • Fix: PS5 Error Code CE-100005-6 (There Was A Problem Reading The Disc)
  • PS5 Controller High Pitch Static Noise
Post navigation
How To Change Windows 10 Profile Picture
Remove A Password from Another Local User Account In Windows 10

HIGHLIGHTS

  • Fix Apex Legends Mobile crashing not launching
    Fix: Apex Legends Mobile Crashing & Not Launching
  • Fix Minecraft not downloading
    (FIX) Minecraft Launcher Not Downloading & Installing On Microsoft Store
  • Fix Switch Sports crashing and not loading
    Fix: Not Loading & Crashing In Nintendo Switch Sports
  • Lego Star Wars Skywalker Saga can't speak to Maz
    LEGO Star Wars: The Skywalker Saga Can’t Talk To Maz
  • Fix Lost Ark crashing, freezing and not launching
    Fix: Lost Ark Crashing PC & Crashing On Loading Screen

LATEST

  • Fix: V Rising Crashing On PC
  • Fix: Apex Legends Mobile Connection Issues & Errors
  • Fix: Apex Legends Mobile Crashing & Not Launching
  • Fix: PS5 Error Code CE-100005-6 (There Was A Problem Reading The Disc)
  • PS5 Controller High Pitch Static Noise
  • About Us
  • Contact Us
  • Privacy Policy
  • Cookie Policy

Subscribe

© 2022 ComputerSluggish