

Reset Chrome Browser To Default
In this post, we will be showing you how you can reset Google Chrome back to its original default settings. This will:
- Reset Chrome settings
- Chrome Shortcuts
- Disable Chrome extensions
- Delete Chromes cookies and other temporary site data
If you have been experiencing problems with Google Chrome such as; It keeps crashing, freezing, not responding, or even websites might be playing up, then resetting Chrome’s settings can sometimes help fix these problems as it will almost be like a new install of Chrome.
It won’t remove your bookmarks, history, and saved passwords.
Restore Chrome To Original Default Settings:
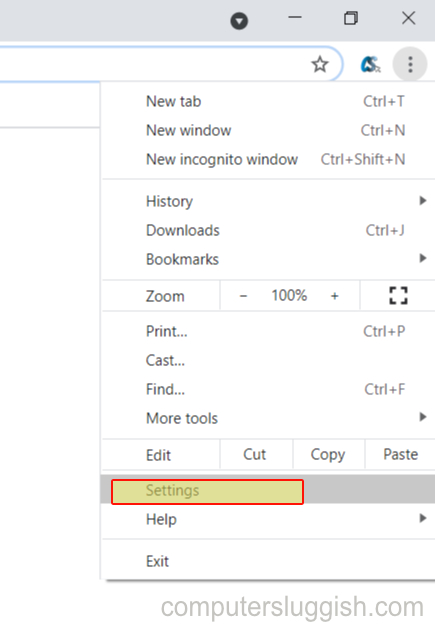
1. Launch Chrome
2. Click the 3 dots in the top right corner > Click “Settings“
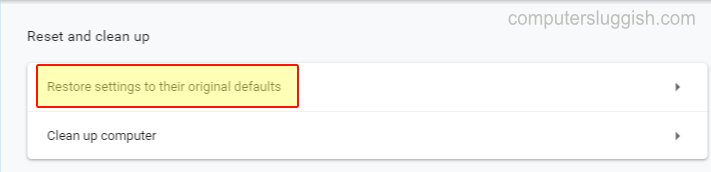
3. Now click on the dropdown arrow next to “Advanced” to expand the menu > Click on Reset and clean up

4. Underneath Reset and clean up click “Restore settings to their original defaults“
4. You will now have a pop up so click the “Reset settings” button

There you have it you have now reset Chrome back to its default settings. Go ahead and see if this has helped resolve the problem you were facing in Chrome.
Also, check out some of our Windows 10 posts here.