Very Quick Way To Scan In Windows 10 With No Software
In this post, like the title says we will be showing you one of the fastest ways to scan something in Windows 10 from your scanner.
And the best thing about this method is you do not need to download or install any additional software or apps like Windows Scan. All you need to do is simply plug in your scanner, or printer that has a scanner into your computer. We have listed the steps to scanning quickly in Windows 10 below.
Quickest Way To Scan Something In Windows 10:
1. First, ensure your scanner is plugged into your computer and turned on
2. Now Open the start menu and search “Control Panel” and open it
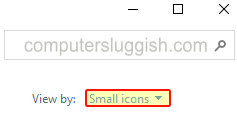
3. In Control Panel change view by to “Small icons“

4. Click “Devices and Printers“
5. Right-click your scanner > Click “Start scan“

6. Now change the settings then click the “Scan” button

7. Now keep “Review, organise and group items to import” selected then click “Next“

8. Now select your image and click Import and the scan will be saved into your Pictures folder

There you have it that is in our own opinion the fastest way to scan in Windows 10. Yes, you could add a shortcut to your desktop to make scanning even faster like we show in this post, but this is only good if you do a lot of scanning from the same scanner and don’t mind having a shortcut on your desktop.
Check out more of our Windows 10 posts here.


