
Boost Performance & FPS In Roblox On PC
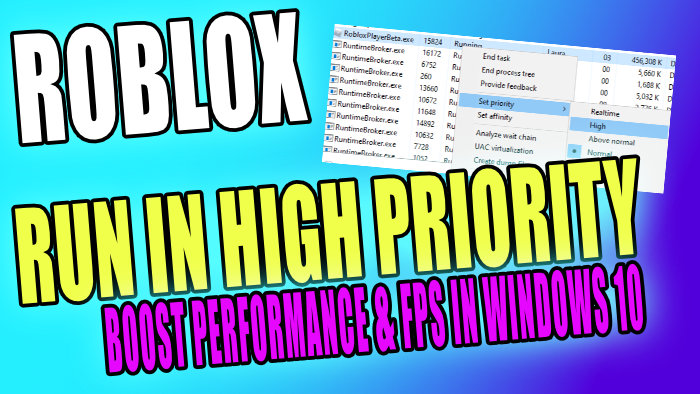
Changing the priority of Roblox in Windows 10/11 can help boost and improve the performance of the game, which can lead to better FPS and also reduce in-game stuttering and lagging.
There are also lots of other things you can do to improve the FPS of Roblox which we cover in this post here.
In this post, we will be showing you how to make Roblox run in high priority allowing it a higher priority than other running processes on your computer.
You will need to do this every time you launch Roblox on your PC or laptop unless you do the second method and use Easy Gamer Utility.
Method 1: How To Change The Priority Of Roblox
1. Firstly you need to launch Roblox > Then press Alt+Tab on your keyboard to minimize the game
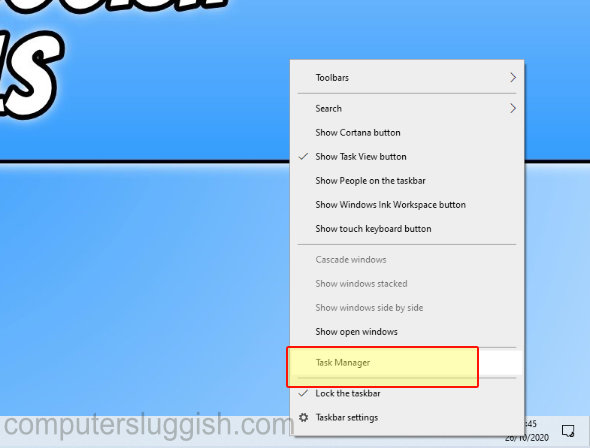
2. Right-click the Taskbar > Click Task Manager
3. Click the Details tab
4. Find Roblox in the list then right-click Roblox > Set priority > Then click “High” -You can then go back to your game

You have now set Roblox to run as high priority. Like we originally said you will need to do the above every time you open Roblox.
Method 2: Use Easy Gamer Utility
Download Easy Gamer Utility here
Once downloaded open the program and click the Launch tab
Now click the Browse button and locate the RobloxPlayerBeta.exe then click Add Game
Change the slider to Above Normal or if you have EGU Pro change it to High then click Save Settings
Now click Launch Game to play Roblox in High or above normal priority

Did you get much of a performance gain in Roblox by changing it to high priority? If you did please comment below!