

Disabling The Windows 10 Audio Service
If you don’t want to have audio on your PC or laptop then disabling the Windows audio service is one way of disabling sound. Alternatively, you could disable your speakers.
Either way, whatever the reason you want to disable your windows audio we have listed the steps below showing you how you can do this.
****Top Tip****
Just keep in mind if you do a Windows update the Windows audio could become enabled again
Windows Audio Service How To Disable:
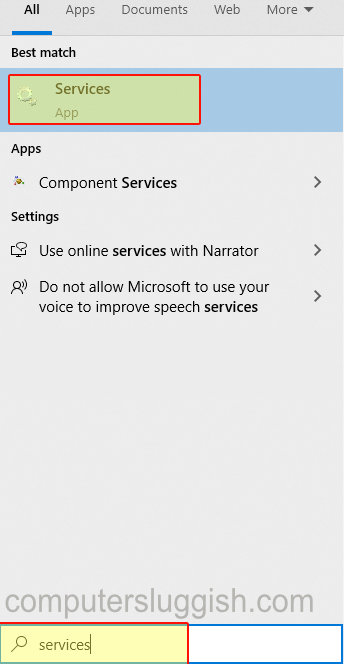
1. Open start menu and search “Services“
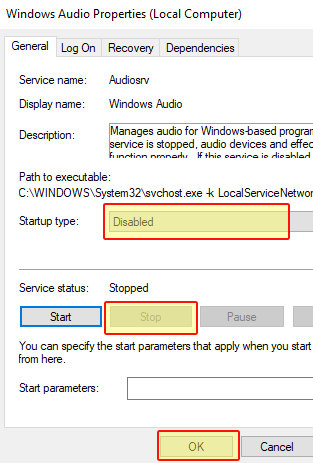
2. Open Services and find “Windows Audio“
3. Right-click “Windows Audio” and click Properties
4. Now change the “Startup type” to Disabled
5. Also click “Stop” under service status
There you have it you have now successfully disabled the Windows audio service. If you restart your PC or Laptop you will notice that the service will not be running and the sound on your computer will no longer be working. Check out more of our windows 10 tutorials here.