
Compress & Protect Important Files
If you have a lot of files and folders on your Windows 10 PC or laptop and want to save storage space, then you can compress files and folders into a single zipped folder.
This is also a great thing to do and will make life easier if you want to transfer files from one PC to another.
If your files are important or you have data that you want to protect, then you can encrypt the zipped folder with password protection.
7-Zip is a great free open source file archiver that you can easily use to zip files on your Windows 10 PC and add password protection for that extra security.
****Top Tip****
Remember or write down your password and keep it somewhere safe
To password protect a zipped file or folder:
1. Click on this link for 7-Zip: https://www.7-zip.org/
2. Select and download the correct file for your version of Windows (if you are unsure of which version of Windows you have then check out this post here) > Press Save file
3. Run setup file > Install > Close > 7-Zip will be installed to your PC
4. Select the documents / files that you want to put into a zipped folder > Right click > 7-Zip > Add to archive > Window will pop up
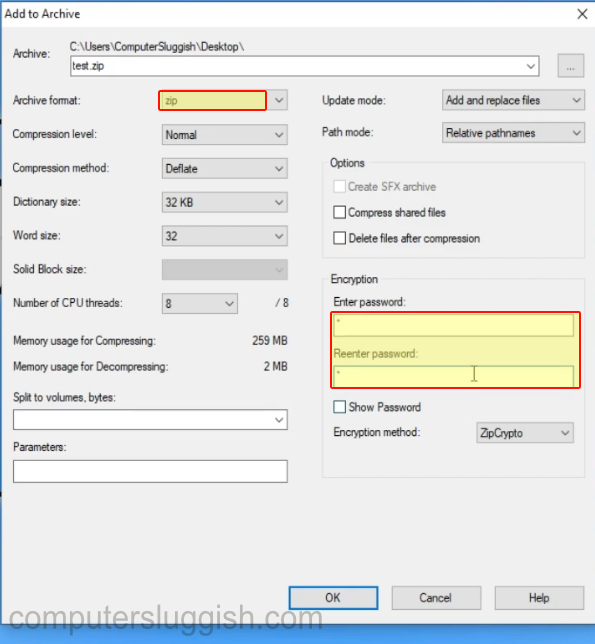
5. Change the archive format from 7z to zip > Adjust any other settings that are applicable to you
6. Type in your password in ‘Encryption’ on the right hand side > Press OK
If you try to open the zipped folder or extract it then it will ask for your password.