
How To Remove Battle.net App From Computer
In this post, we will be taking a look at how you can uninstall the Battle.net app in Windows 10.
If you do still have games that you have installed using the Battle.net app then by removing the program you will no longer be able to play those games as the battle.net app is required to launch them, and it’s also required to install the updates for those games. We have listed the steps below on how to remove the battle.net app
****Top Tip****
Uninstalling the Blizzard.net app might remove your games so you will need to download them again if you reinstall the Blizzard.net app!
How To Remove Battle.net app From Windows 10 Computer:
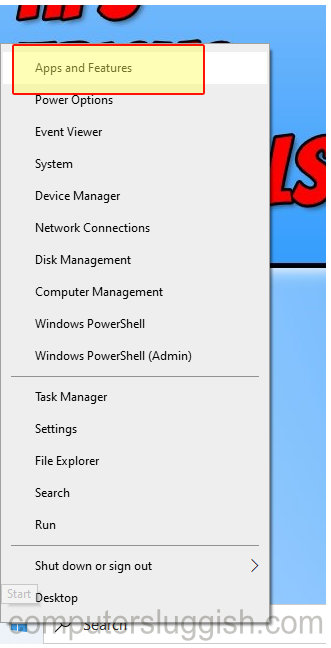
1. Right-click the start menu icon
2. Open up “Apps and Features“
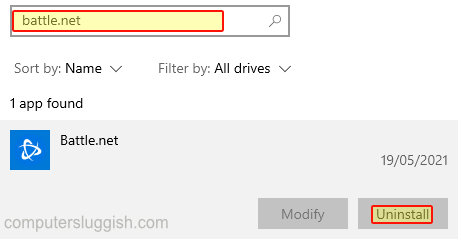
3. In the search box that says “Search this list” type “Battle.net app“
4. Now select Battle.net app and click the “Uninstall” button
5. Follow the on screen instructions
There you have it that’s how you remove the Battle.net app in Windows 10 from your PC or laptop.