In this guide, I will be showing how to install the latest Realtek Network Driver on your Windows 11 PC.
It’s fairly straightforward to install the Realtek Network drivers in Windows 11, but before you can install the driver you will need to ensure your PC or Laptop is using a Realtek Network adapter/card. If it’s not then you will not be able to install the driver and will need to download a different driver, so below I have listed the steps on installing the Realtek network driver.
Table Of Contents
Why Install The Latest Realtek Network Driver?
There are many reasons why you should update and install the latest Realtek network driver. It can help resolve problems with the current driver you have installed, and most of all it can also improve the stability and performance of your network adapter/card.
Can Anyone Install The Realtek Network Drivers?
The answer is no, not everyone can just install the Realtek Network driver on their computer. If you are using a network adapter or card that has been manufactured by a different company then you will need to download and install the drivers from their website, as these drivers will not work.
How Can I Find Out If I Have A Realtek Network Adapter?
There are a few ways of finding out if your Windows PC or laptop is using a Realtek adapter or card. You can either check the manufacturer’s website for your motherboard, if you purchased your computer online then check the specification for your system, or you can check within Windows 11 in Device Manager.
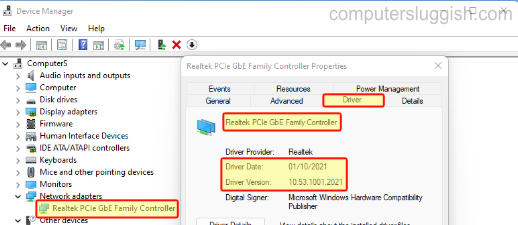
TIP: To check in Windows Device Manager you need to right-click on the Windows start menu icon and select “Device Manager” > Now expand the “Network adapters” option and you will then see the make of your network card/adapter. You can also right-click the adapter and select “Properties” > Now click the “Driver” tab you will then see the Driver Date & Driver Version.
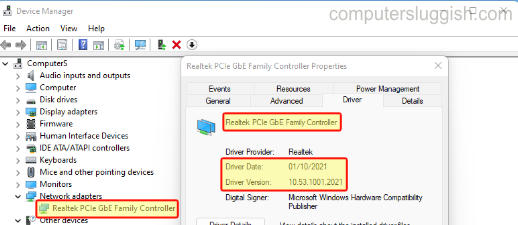
Installing the latest network driver for your Realtek network card is fairly easy to do and very similar to how you do it in Windows 10.
Manually Install The Latest Realtek Network Driver:
Below are the steps for installing Realtek network driver in Windows 11.
1. You now need to go here to download the Realtek Network Driver > Select the driver for your network card/adapter
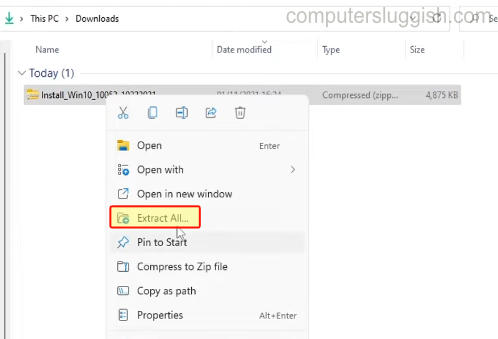
2. Once the driver has downloaded right-click the compressed folder and click on “Extract All…“
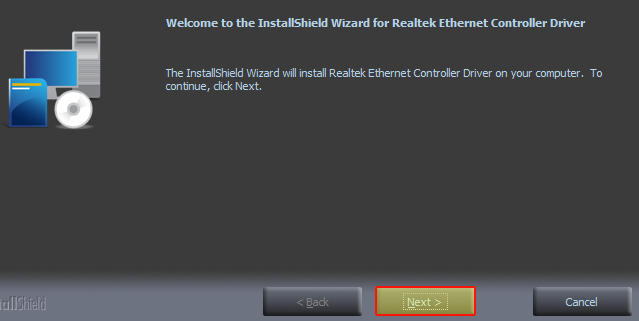
3. You will see a setup file within the folder that you just extracted > You need to double click on this file and it will then check to see if you can install the Realtek Network driver to your computer > Click on Next
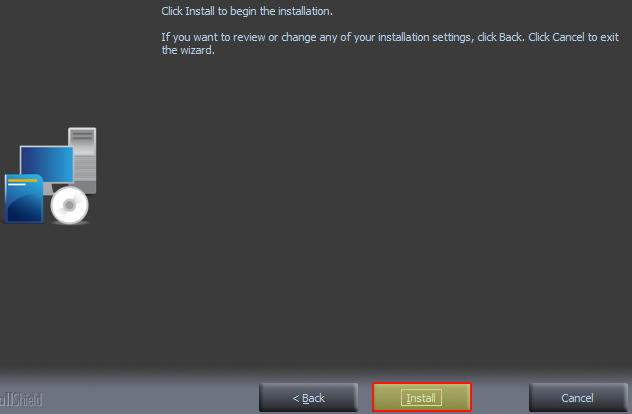
4. Click “Install” and the Realtek Network Driver will begin to install on your PC > You will notice that your network adapter has been disconnected from the internet > Once finished you will then be reconnected and you can then click “Finish“
5. Check within Windows Device Manager to ensure the latest Realtek Network driver has been installed successfully by right-clicking on the Windows 11 start menu > Click “Device Manager” > Expand “Network adapters” (You can also right-click your Realtek Network adapter and go into Properties and select “Driver“. You can also see the currently installed Driver Date and Version to ensure you now have the latest version installed)
There you have it that’s how you install the latest Realtek network drivers to your Windows 11 PC or Laptop. If you were having issues with your network adapter such as your internet connection was dropping out etc, then hopefully the latest driver will resolve those issues.
If you found this guide helpful then I am sure you will like our other Windows 11 guides here.


