
In this guide, we will be taking a look at how to clear the NVIDIA cache on your PC or laptop. If you have an NVIDIA graphics card then it will have accumulated a load of cache files over the time that you have been using it.
And depending on how long that has been will depend on the size of your NVIDIA cache.
It doesn’t matter which Operating System you are running, for example, Windows Home, Pro, Enterprise, etc. You will still need to clear your NVIDIA cache just the same.
If you have been having graphical issues with a game or program within Windows, and you have an NVIDIA graphics card, then clearing its shader cache could help fix the problem that you are having.
It could also help fix any stuttering or latency issues that you are having in games on your PC.
Clearing the GPU cache files can also help with many problems that you may be having when trying to stream, record or edit using the nvenc encoder in programs such as OBS Studio, Bandicam, or Davinci Resolve, etc.
Even if you currently have the most powerful GPU, there could be an issue with one of the cache files that’s causing the issue.
So once you have removed the NVIDIA cache, the files will then be automatically regenerated over time.
If you are having issues with your AMD graphics card then you can also clear the AMD shader cache easily.
Is it safe to remove the NVIDIA cache?
Yes, it’s perfectly fine to remove the cache files within the NVIDIA DXCache folder, NVIDIA GLCache folder, and NV_Cache folder these files are created by your NVIDIA graphics card.
The NVIDIA cache files will be recreated when needed, but just like making other changes in Windows, it’s always a good idea to make a backup of any important documents on your PC.
Related: Manually update NVIDIA GPU driver

Can I delete files and folders inside NVIDIA Corporation Installer2 and what purpose does this folder serve?
The Installer2 folder which is located in “C:\Program Files\NVIDIA Corporation\Installer2” is used by the NVIDIA driver installer to store temporary files and installation data during the installation process.
So basically it helps in managing the installation and allows you to roll back or repair your NVIDIA driver if necessary.
So deleting the files or folders within this directory could cause issues with your NVIDIA driver so it is not recommended to delete any files in this folder.
The only files that are safe to remove are the files that are shown within this guide and those are the cache files as they are temporary files that will get replaced with new files when they are needed.
How to clear NVIDIA shader cache & cache files in Windows
Below are the steps to clear your NVIDIA cache on a Windows 10 or Windows 11 computer.
Method 1: Clear NVIDIA cache files using EGU
An easier way of clearing the NVIDIA cache files is to use our program called Easy Gamer Utility. This program has a one-click button that will clean all NVIDIA cache files.
First, you need to download Easy Gamer Utility
Once downloaded run the setup file of the program and launch it once installed
Select the Clean Tab and make sure you have Graphics selected
You will now see an option that says Clear NVIDIA cache files so click the Clean button

Method 2: Clear NVIDIA cache files in Windows
We can also clear clear the NVIDIA DXCache and NVIDIA GLCache using File Explorer in Windows.
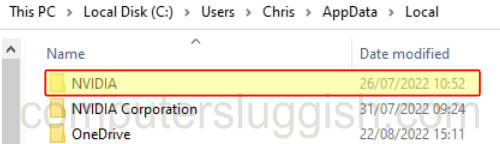
1. Open up File Explorer > Type %localappdata% into the address bar and press enter
2. Find the NVIDIA folder and open it
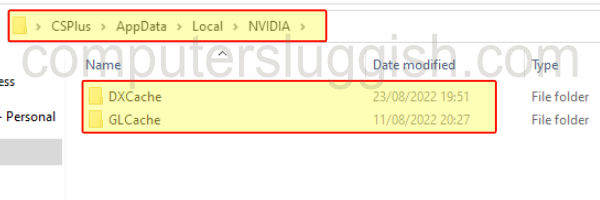
3. Open the DXCache folder first > Select all the items in this folder > Right-click and select Delete
4. Then go back and open the GLCache folder > Select all the items in this folder > Right-click and select Delete
Now you have removed the files from the DXCache and GLCache in the Nvidia folder, we can remove the cache files in the NV_Cache folder:
1. Open up File Explorer > Type %localappdata% into the address bar and press enter
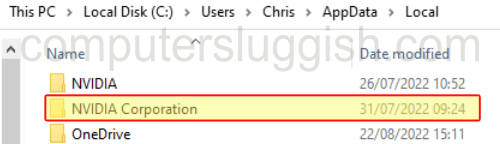
2. Now find the NVIDIA Corporation folder
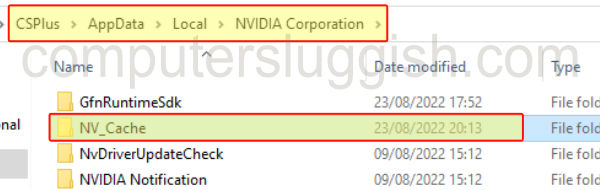
3. Open the NV_Cache folder and Delete all the files in here
NVIDIA shader cache location
Just to summarize below is a list of the NVIDIA shader cache locations in Windows 10 and Windows 11. So it’s easier for you next time to clear your Nvidia driver cache.
- C:\Users\YOUR USERNAME\AppData\Local\NVIDIA\DXCache
- C:\Users\YOUR USERNAME\AppData\Local\NVIDIA\GLCache
- C:\Users\YOUR USERNAME\AppData\Local\NVIDIA Corporation\NV_Cache
Final thoughts
We hope the above guide helped you clear your NVIDIA shader cache files and it helped resolve the issue you were having with either your graphics or nvenc, or at least free up some decent space on your PC!
If you wanted to know how to clear your GPU cache, then you can see how easy it is to do.
If you enjoyed this guide and found it helpful then we are sure you would like our other Windows guides.
Check out our YouTube video here on “Delete NVIDIA Cache To Fix Game Stutter & Performance Issues” if you are getting stuck.