
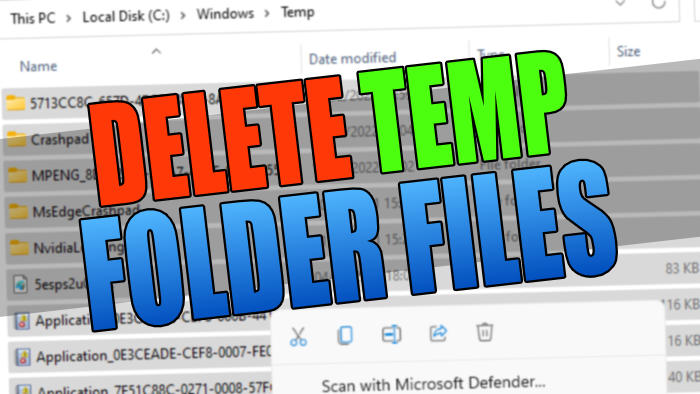
In this guide, we will be taking a look at how you can manually remove and delete temp files in Windows 11. And you can do this without having to download additional disk cleaning software.
This folder can get pretty large over time so clearing out the clutter can free up some storage space. And you never know, it might even help speed up Windows 11! If you are clearing the temp folder because you are having issues with a program or app then you might also want to try clearing the DirectX shader cache in Windows 11.
TIP: You will need to be signed in as an administrator to be able to remove all the files which are in this folder.
Why Delete The files?
There is a lot going on within the background of Windows 11 while we are using this operating system. And one of those things is storing temporary files. There are many different temp folders within Windows 11 but the one we will be focusing on is not your local user temp folder, but the one which is created within the Windows system folder.
There are a few different reasons why you would want to remove the temporary files on your Windows 11 PC or laptop. It could be that you are experiencing an issue with Windows11 or with an app or program. You may be looking to free up some disk space or simply clean out all the old rubbish off your computer.
Is it ok to delete files in temp folder
Yes, it is safe to remove the files within the Windows temp folder. However, just ensure when deleting everything in the folder that you are happy with what you are deleting.
If there is a file that you’re unsure about then it’s best to leave it alone. Also, as always back up any important files just in case anything was to take a turn for the worse, which it shouldn’t.
Related: How to delete prefetch files in Windows 11
How To Manually Delete Temp Files Windows 11
Below are the steps to delete temp files in Windows 11.
1. First, open up File Explorer
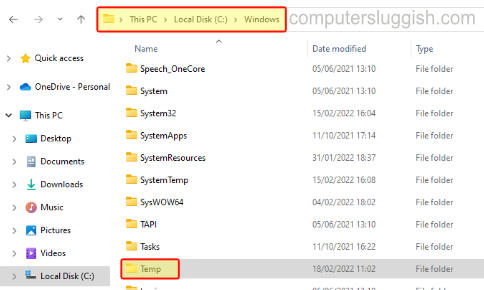
2. Now open your C: Drive > Go to the Windows Folder
3. Open the Temp Folder
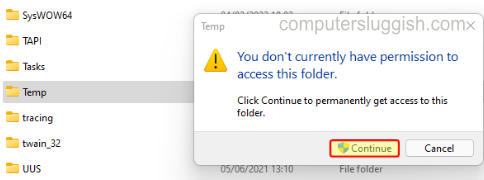
4. If a message pops up saying “You don’t currently have permission to access this folder.” then press Continue (remember you need to be signed in as an admin)
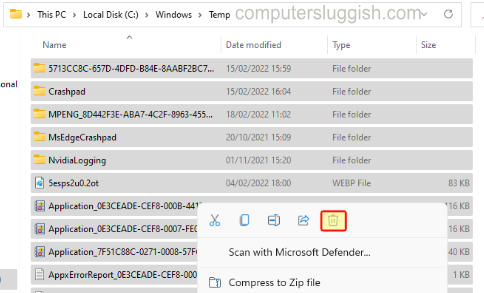
5. You can now either select all the files or go through and only delete the files you are happy to remove (If you Ctrl + A to select all > Then right-click and select Delete)
That’s how you can clear up your Windows 11 temp folder, which is the same as deleting temp files in Windows 10. Especially if it is beginning to take up to much space on your computer! I quite often clean out the temp folder and prefetch folder to help keep Windows 11 clean and optimized.
I hope this guide helped you out and save you some disk space. If you did find this Windows 11 guide helpful then you should check out all our other guides.