
In this guide, we will be taking a look at how you can remove or uninstall a Realtek audio driver from your Windows 11 PC or laptop. If you are using Realtek audio drivers in Windows 11 and have decided that you no longer want to have them installed, then you can easily remove them.
Once you have uninstalled the audio driver, Windows 11 will then install the best audio driver it can detect for your sound card. But you can then also install the driver of your choice, providing it is compatible with your sound card.
Can I Reinstall Realtek Audio Drivers Again?
Yes, you can. If you have uninstalled the driver and decide that you would actually like to install Realtek HD audio drivers again, then this is very easy to do. All you need to do is go to the Realtek website, download the driver then run the setup file as shown in this guide.
Why Remove A Realtek Driver?
There can be many reasons why someone would like to remove an audio driver in Windows 11. It could be that you are facing issues with the driver that’s installed such as no sound, sound crackling, or perhaps it just keeps glitching. So removing the driver then allowing Windows to detect the best driver suited for your sound card could resolve the issue. Or reinstalling the Realtek audio driver again, could resolve this.
Related: remove Realtek Drivers in Windows 10
How To Uninstall Realtek Audio Driver In Windows 11:
Below are the steps on how to remove Realtek audio drivers in Windows 11.
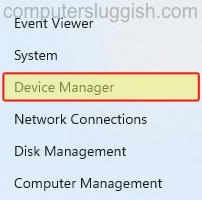
1. Right-click on the Windows start menu icon and select Device manager
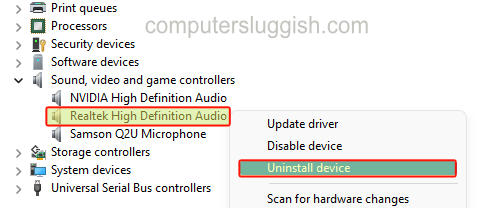
2. Expand “Sound, video and game controllers“
3. Right-click Realtek High Definition Audio and select Uninstall device
4. Tick the box “Attempt to remove the driver for this device” then click Uninstall

5. It will now begin to start removing the Realtek High Definition Audio driver from your Windows 11 computer

6. Once finished restart your computer and the Realtek Driver will have been removed
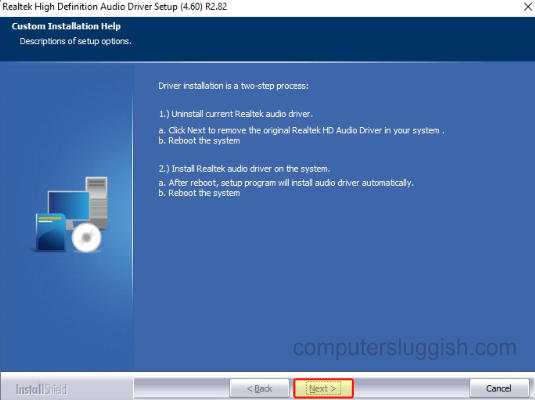
7. Alternatively, you can also remove the Realtek audio driver by downloading the driver setup file > Then follow the instructions and select remove driver as shown in the screenshot below.
I hope the above guide has helped remove the Realtek High Definition Audio driver from your Windows 11 PC or laptop. And hopefully resolved the audio issue you were facing on your computer.
If you did find this guide helpful then I am sure you would like our other Windows 11 guides.