
Elden Ring is an awesome open-world fantasy game, which is great fun when it’s working! So in this guide, we will be taking a look at resolving some of those pesky annoying DirectX error messages. These errors will pop up when trying to play Elden Ring on your Windows PC.
These could cause the game to crash and freeze, so it’s no fun if you are mid-game and a DirectX error pops up on your screen, making Elden Ring crash to your desktop.
What Causes DirectX Issues In Elden Ring?
The most common cause for getting DirectX issues in a PC game is that you don’t have the latest version of DirectX installed. But it could also be that your graphics card does not meet the minimum requirements, so ensure you have a graphics card better than:
Minimum:
- NVIDIA Geforce GTX 1060 3GB
- AMD Radeon RX 580 4GB
Recommended:
- NVIDIA Geforce GTX 1070 8GB
- AMD Radeon RX Vega 56 8GB
What Version DirectX Is Required For Elden Ring?
Elden Ring requires DirectX 12. So to be able to play Elden Ring on your Windows computer you are going to need to be using either Windows 10 or Windows 11, as those two operating systems support DX12.
You will also need to ensure that your graphics card supports DirectX 12, which we have listed the minimum GPU you can have to play the game above.
How To Fix Elden Ring PC DirectX Crashes:
1. Update DirectX 12
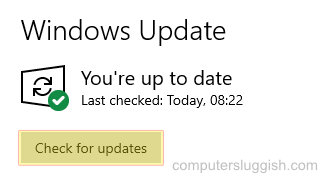
Unlike previous versions, DirectX 12 is updated through Windows 10 & Windows 11 updates. So firstly, you need to ensure you have the latest version of DirectX 12 installed so you need to check for updates:
Windows 10:
- Right-click the Start menu icon and select Settings > Now click Update & Security
- Click Check for updates button
Windows 11:
- Right-click start menu icon and select Settings
- Click on Windows Update on the left-hand menu and then “Check for updates“

2. Update DirectX Files
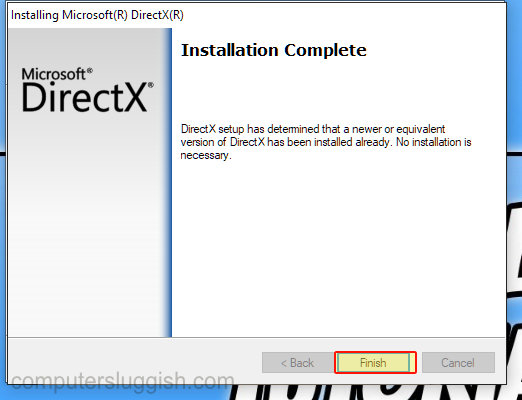
Even though Elden Ring uses DX12, it’s still worth ensuring older versions of DirectX are also up to date:
- You need to go here and download the DirectX setup file
- Run the file and follow the steps
- (If you get stuck we have a guide for Windows 10)
3. Clear DirectX Shader Cache
Now you have ensured DirectX is up to date you need to clear the DirectX shader cache using Windows disk clean-up. This is the same method for Windows 10 & 11:
- Open the start menu and search Disk Clean-up and select it
- Now select your C: Drive
- Deselect everything except DirectX Shader Cache > Then press OK then Delete Files

4. Update Your Graphics Driver
If your GPU driver is out of date then you are going to run into issues. Not only with DirectX but also other graphical issues(LINKX)
5. Repair Game Files
If the above methods have not worked then the next thing to do is to ensure none of the Elden Ring game files have become corrupted or missing, and this can be done within Steam:
- Open Steam and find Elden Ring in the Library
- Right-click on the game and go to Properties
- Select Local Files and then “Verify Integrity of game files…“

We hope the above methods helped fix the Directx error message that was crashing Elden Ring on your PC. Hopefully, you are able to play the game without any other interruptions like graphical issues or crashing problems.
If you did like this guide then you can check out more of our gaming guides here.