Minecraft has been around for a long time now. In fact, it was first released back in 2011. And as you probably already know it is a very popular sandbox, crafting, and exploring game. But if you are struggling to play the game because you are having issues with the Minecraft launcher not downloading or not installing from the Microsoft Store, then this is very frustrating.
So that’s why in this guide, we will be taking a look at fixing the issue of the Minecraft Launcher download not working when trying to use the Microsoft store on your computer. You may also be having issues with the Minecraft launcher not installing on your computer.
It can be very frustrating, as you need to have the launcher installed on your Windows 10 or Windows 11 PC or laptop, to be able to play the Minecraft game. Luckily, I have a few different methods that you can do if the Minecraft Launcher won’t install or download, and I have listed these below.
Table Of Contents
Reasons why Minecraft Launcher won’t install
Before you try the methods below, it’s worth mentioning that the Minecraft Launcher is not supported on Windows 10 in S mode. And also ARM devices are unsupported.
So if you using either one of these then this will be the reason why you are unable to download the launcher. It could also be caused by your time zone being incorrect, or something as simple as the Microsoft Store cache.
Is Minecraft free?
Unfortunately, Minecraft is not free. And you will need to purchase the game in order to be able to play this fantastic survival adventure game.
You will need to sign in to an account that you have purchased Minecraft on, in order to to use the Minecraft Launcher.
What is the Minecraft Launcher?
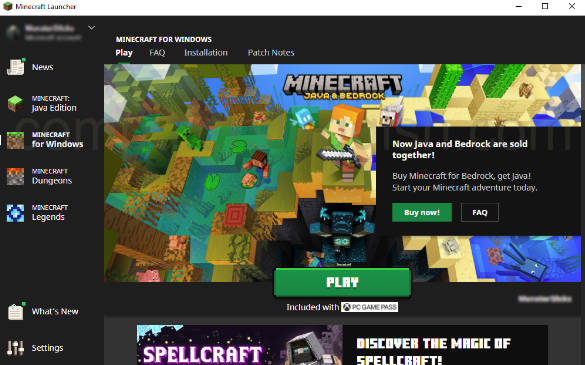
The Launcher allows you to download and install Minecraft for Windows, Minecraft Java Edition, and Minecraft Dungeons to your Windows 10 or Windows 11 PC or laptop. And once installed, you will then be able to launch the game using the Launcher.
Related: 5 methods to fix most issues with Minecraft on PC
How To Fix Minecraft Launcher Not Installing In Microsoft Store:
Below are the methods that will hopefully get the Minecraft launcher installed onto your Windows computer, so you will be playing Minecraft in no time at all!
Fix 1: Sign out of Microsoft Store & Xbox App
Sign out of both the Microsoft Store and the Xbox App. Sometimes the apps can glitch causing the Minecraft Launcher to not download and get stuck. Once you have signed out of both apps, go ahead and sign back into your Microsoft account in them both:
- Within the Microsoft Store select your Profile icon and click Sign out
- Within the Xbox App select your profile icon and click Sign out

Fix 2: Ensure the correct time & date
Make sure you are using the correct time and date on your computer. If you are not then this can not only cause issues with Windows but also stop you from being able to download the launcher from the Microsoft Store:
- Right-click the Time & Date in the system tray and select Adjust date/time
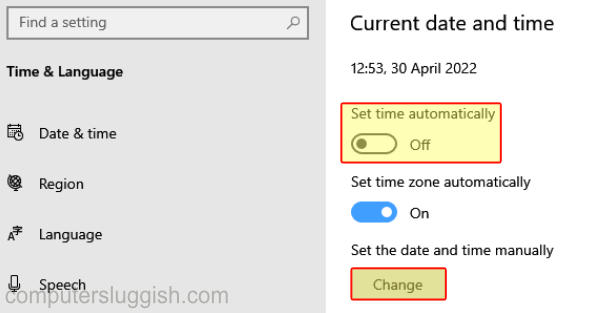
- Toggle Set time automatically to Off
- Now click the Change button under or next to “Set the time and date manually“
- Set the correct Time and Date in the pop-up window > Then click Change
Fix 3: Check the time zone
Same as above with the time and date, ensure you have your correct time zone selected:
Windows 10:
- Right-click the Time & Date in the system tray and select Adjust date/time
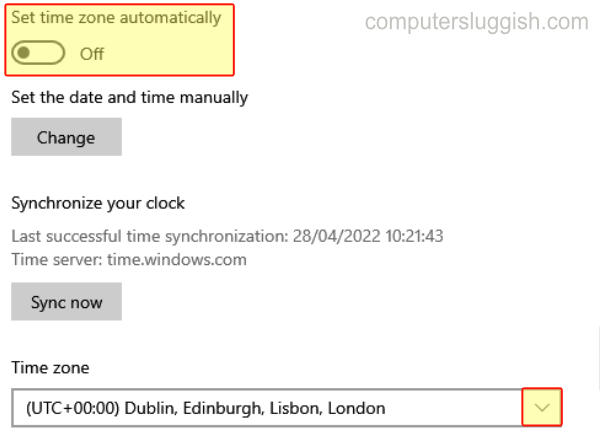
- Toggle Set time zone automatically to Off
- Under Time zone click the drop-down and select your time zone
Windows 11:
- Right-click the Time & Date in the system tray and select Adjust date/time
- Click the drop-down next to Time Zone
Fix 4: Check the correct region
If you have not got Windows set to your region, then again this could cause issues with the Windows Store. Causing it to get confused and not work correctly:
Windows 10:
- Right-click the Time & Date in the system tray and select Adjust date/time
- Under Related Settings select Date, time & regional formatting
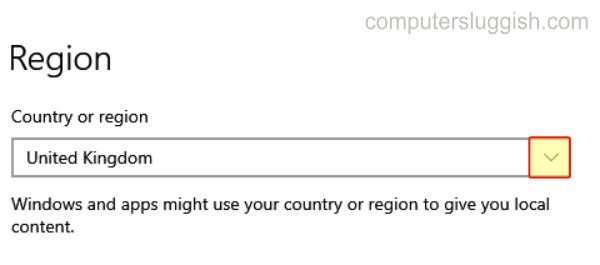
- Now under Country or region ensure you have your correct country or region selected
Windows 11:
- Right-click the Time & Date in the system tray and select Adjust date/time
- Under Related Links click Language and region
- Next to Country or region ensure you have the correct country or region selected
Fix 5: Sign out all users
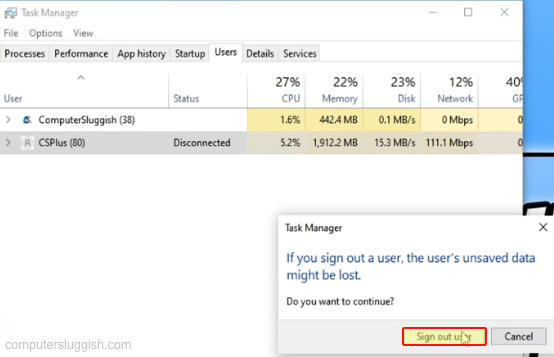
Make sure you are the only user profile that is currently signed into Windows, to prevent any conflicts. Something as simple as this can be the reason why you can’t install the Minecraft Launcher on your PC:
- Right-click the Start menu icon and select Task Manager
- Click the Users tab
- Now right-click on each User and select Sign out > Then select Sign out user
Fix 6: Update Windows
Ensure Windows is up to date. This is very important and can resolve many issues:
Windows 10:
- Right-click the start menu and select Settings
- Now click Update & Security
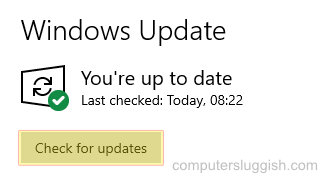
- Go ahead and click that Check for updates button
Windows 11:
- Right-click the start menu and choose Settings
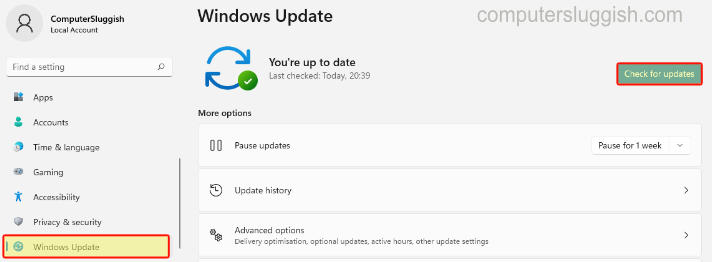
- Click Windows Update in the left menu
- Now click Check for updates
Fix 7: Clear Microsoft Store cache
Like many things, it is a good place to start by clearing the cache for the Microsoft Store, in case one of the cache files is the root of the issue:
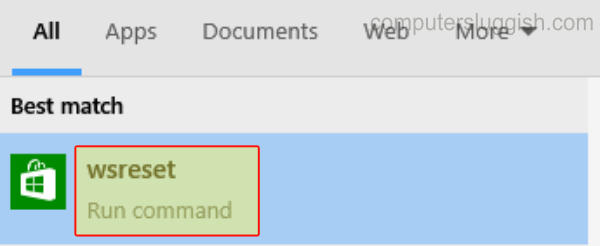
- Open the start menu and search wsreset
- Now click on wsreset
- Allow it to run and once finished restart your computer
Fix 8: Update apps in the Microsoft store
Check you have installed all of the latest updates for all apps within the Microsoft Store. There could even be a new update for the Store which might resolve the issue with it not letting you install the Minecraft Launcher:
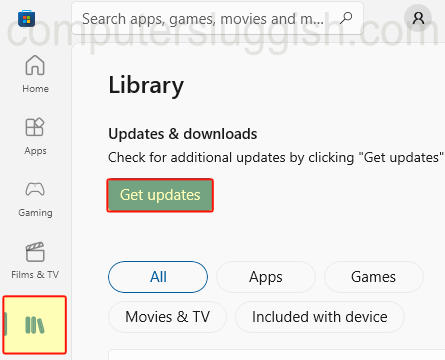
- Open the Microsoft Store
- Select Library > Now click the Get Updates button
Fix 9: Windows Store apps troubleshooter
Run the Windows troubleshooter and see if it can detect any issues with the Microsoft Store, that would cause the Minecraft Launcher not installing problem:
Windows 10:
- Right-click the start menu and select Settings
- Click Update & Security
- Now select Troubleshoot in the left menu
- Select Additional troubleshooters
- Now click Windows Store Apps then Run the troubleshooter
- Follow the steps in the troubleshooter
Windows 11:
- Right-click the start menu select Settings
- Now select the System tab and then click Troubleshoot
- Select Other trouble-shooters
- Now click the Run button next to Windows Store Apps
- Follow the troubleshooter steps

Fix 10: Repair Microsoft Store
Running a repair on the Microsoft Store can sometimes work wonders in resolving many weird glitches and problems, such as when the Minecraft Launcher won’t download or install:
Windows 10:
- Right-click the start menu and select Apps and Features
- In the search box type Microsoft Store
- Now select Microsoft Store and click Advanced options
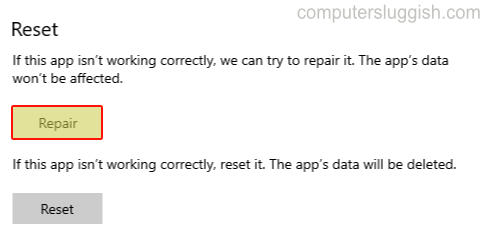
- Click the Repair button
Windows 11:
- Right-click the start menu and select Apps and Features
- In the search box type Microsoft Store
- Now click the 3 dots next to Microsoft Store and select Advanced Options
- Click the Repair button
Fix 11: Reset Microsoft Store
If repairing did not help fix the Microsoft Store not letting you install Minecraft Launcher then resetting is the next thing to try. But just keep in mind this will delete all of the app’s data:
Windows 10:
- Right-click the start menu and select Apps and Features
- In the search box type Microsoft Store
- Now select Microsoft Store and click Advanced options
- Click the Reset button
Windows 11:
- Right-click the start menu and select Apps and Features
- In the search box type Microsoft Store
- Now click on the 3 dots next to Microsoft Store and select Advanced Options
- Click the Reset button

Fix 12: Reset proxy
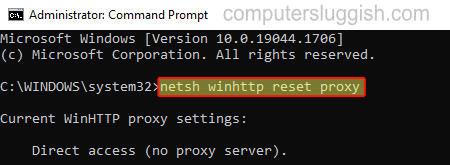
If you are not able to download Minecraft Launcher due to a network issue then try resetting your proxy settings. This can be done with the below command:
- First, open the start menu and search Command Prompt > Right-click on it and select “Run as administrator“
- Now type the following and press enter: netsh winhttp reset proxy
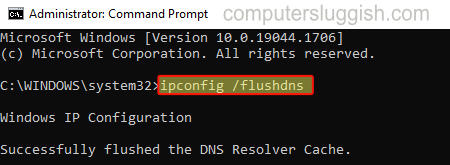
Fix 13: Flush DNS
Same as above, try flushing your DNS as this can help resolve network issues that can result in you not being able to download the Minecraft launcher on Windows:
- Open the start menu and search Command Prompt > Right-click on it and select “Run as administrator“
- Type in the following command and press enter: ipconfig /flushdns
Fix 14: Change Public DNS
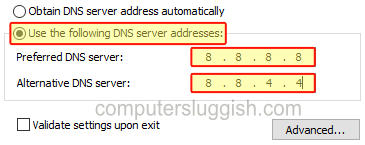
Try changing the public DNS server settings for your Windows computer:
- Open the start menu and search Control Panel and open it > Now change View by to Small icons
- Click Network and Sharing Centre > In the left menu click “Change adapter settings“
- Right-click on your network adapter and select Properties
- Now select “Internet Protocol Version 4” and click Properties
- Select “Use the following DNS server addresses“
- Now type 8.8.8.8 and 8.8.4.4 then press OK (you can check the Google public DNS settings here)
Fix 15: Reinstall Microsoft Store
If none of the methods above have helped then the last thing to try is using PowerShell to reinstall the Microsoft Store:
- Open the start menu and search for PowerShell
- Right-click PowerShell and select Run as administrator
- Copy the following code and paste it into PowerShell and press Enter:
Get-AppXPackage *WindowsStore* -AllUsers | Foreach {Add-AppxPackage -DisableDevelopmentMode -Register "$($_.InstallLocation)\AppXManifest.xml"}I hope the above guide helped resolve the Minecraft Launcher not downloading or installing in the Microsoft Store, on your Windows 10 or 11 PC.
If you are still unable to get the Minecraft launcher to work then you might need to reset Windows, but this will depend if you have the same issue when trying to download anything else from the Microsoft store!
If you did enjoy this guide and found it helpful then I am sure you would like all of our other Windows guides.
