
Unlock Power Plan For Ultimate Performance Windows 11
In this post, I will be showing you how to add the ultimate performance power plan to your Windows 11 PC or laptop.
I have said the word “add” as this power plan is actually hidden within Windows and requires a little code to be able to reveal it, and you will then be able to select it from your Windows 11 power plans. You will see later on in this post how to do this and will probably notice this was the same with Windows 10.
After you have added the ultimate power plan and started using it, you will notice that everything within Windows 11 will be running even smoother than any of the default power plans you can choose from.
Why Use The Ultimate Performance Power Plan?
There are many reasons why you should use the ultimate performance power plan in Windows 11.
Firstly, it will make everything within the operating system run a lot smoother and better as your system will be using more power than any other power plan that is available on your computer. If you are using Windows 11 virtual desktop to run multiple desktops for example, then this power plan will help.
Secondly, it can help make your software and apps run a lot quicker.
Thirdly, if you enjoy playing games on your Windows 11 computer then if you have not already guessed it can help improve the performance of your games and increase frame rate, which is what every gamer wants. The better your FPS the smoother and better your games will run. So as you can see the benefits of using the Ultimate Performance Plan are extremely good!
Is The Ultimate Performance Power Plan Safe?
Yes, it is safe to use this power plan but it will use a lot more power than the default power plans. But just like anything when it comes to modifying Windows 11, I would recommend you create a system restore point and back up any files before enabling the Ultimate Performance power plan.
Also the only time you might not want to have the ultimate power plan turned on is if you are using your laptop without it being plugged into the mains, as it will drain your battery faster! So if you are looking to improve the amount of time the battery life lasts on your laptop, then this is not going to help.
Related: How to change graphics performance in Windows 11
How To Enable The Ultimate Power Plan In Power Options Windows 11:
Below are the steps to add the ultimate performance power plan and have that ultimate performance mode on your Windows 11 PC or laptop.
1. First, you need to ensure you are signed in as an administrator (if you don’t have an admin user in Windows then ask the main administrator of your PC to change your standard user to an admin)
2. You now need to open the start menu and search for “Windows PowerShell“
3. Now right-click on Windows PowerShell in the start menu and select “Run as administrator“

4. You will now have the Windows PowerShell window open on your screen
5. Next you need to copy the below code:
powercfg -duplicatescheme e9a42b02-d5df-448d-aa00-03f14749eb61
6. Once copied you now need to paste the code into PowerShell by pressing “Ctrl+V” on your keyboard (or if you would prefer you can type the code manually into PowerShell)
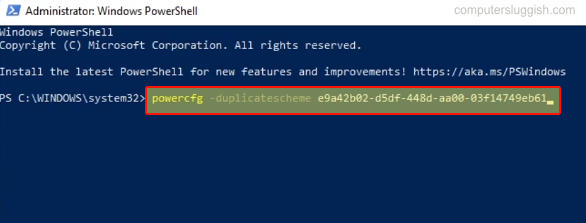
7. Now you have the code in PowerShell press Enter to execute the command which will add the Ultimate Performance power plan to Windows 11
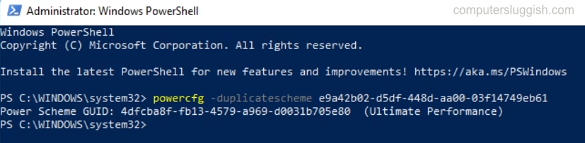
8. Once finished it will have a new blank line, as you can see in the screenshot below > You can now close PowerShell
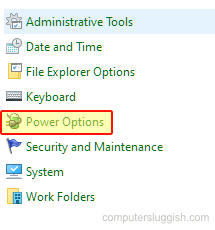
9. You now need to set Windows 11 to use the new power plan so you need to open the start menu and search “Control Panel“
10. Now change the Control Panel “View by” to “Small icons“
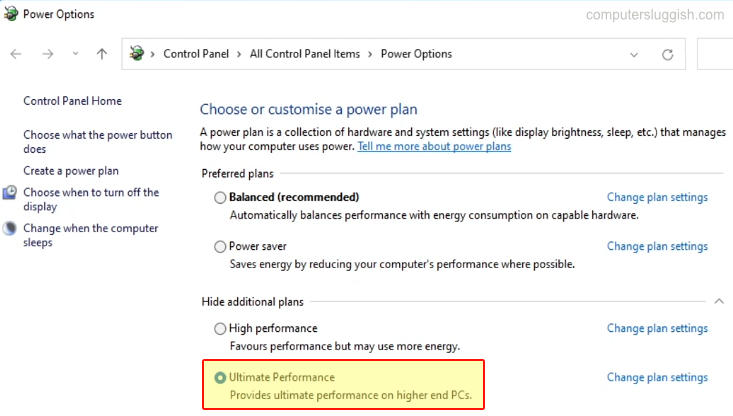
11. You will see an option for “Power Options” > You need to select this
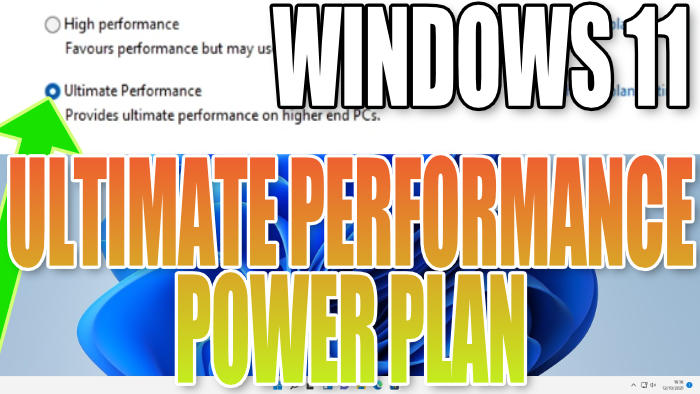
12. Now expand “Show additional plans” > Select “Ultimate Performance” > Windows 11 is now using the Ultimate Performance power plan
Add Ultimate Power Plan Using Our Program
If you would prefer you can use our program called Easy Gamer Utility to add the ultimate power plan to Windows 11 but it will require you to purchase the PRO plan.
Download Easy Gamer Utility from here
Now click on the Tweaks tab once activated then tick Add Ultimate power plan and click Apply then do the above in the Control Panel to start using the plan

Final Thoughts
That’s how you add and turn on the hidden Ultimate Performance plan in Windows 11. Like I previously said if you are looking at ways to try and improve the performance of Windows 11 and your programs, apps, and games, then changing the power plan to ultimate can really help. It will tell Windows 11 to use more power than the other power plans.
However, if you are looking to save power then this is not the power plan for you, and it will also drain your laptop’s battery quickly when it’s not plugged into the mains.
If you do decide that you don’t like the Ultimate Performance power plan then you can always switch back to using a different power plan as they will all still be available. So you could choose from Power Saver, Balanced, or High-Performance power plans.
Check out our YouTube video here on How To Unlock Ultimate Performance Power Plan In Windows 11 if you are getting stuck.