
Table Of Contents
Manually Remove Files In Windows 10 Temp Folder
The Windows 10 temp folder is where Windows stores a lot of its temporary files. You can safely remove the files that are within the temp folder. However, just check what files you are deleting before removing them, it’s better to be safe than sorry.
The temp folder can get very large at times if you do not keep on top of removing the temp files within this folder. So clearing out the temp folder is a great way to free up some valuable disk space on your PC or laptop.
How To Remove Files In Windows Temp Folders:
Below are the steps for removing the files within the Windows 10 temp folder.
1. Open File Explorer
2. Type C:\windows\temp into the address bar and press enter: (You will need to be signed in as an administrator to access the folder)
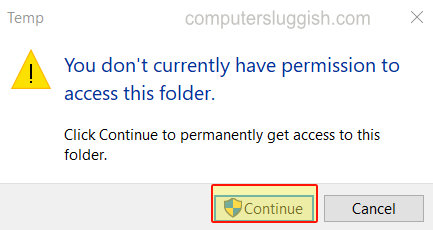
3. Click Continue if a window has popped up saying “You don`t currently have permission to access this folder. Click continue to permanently get access to this folder.”
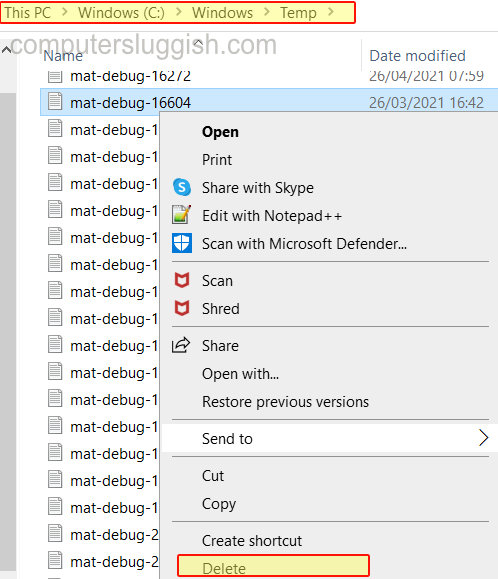
4. You can now select the files you would like to remove then right-click on them and delete
That’s how you remove the files within the Windows 10 temp folder manually. There are other ways you can remove the temp files, and also a lot more temporary files like using one of these disk cleaners.